The latest? What exactly constitutes a millennial? And what’s all that Gen X/Y business?
It turns out that there’s actually not broad consensus on exactly what the date are, but they look something like this:
Generation Name
Birthdate Range
Silent Generation
1925-1945
Baby Boomers
1946-1964
Generation X
1965-1979
Millennials / Generation Y
1980-1996
Generation Z
1997—Present
They tend to run 15-20 years, which means we’re around the time for needing a new term for those post Generation Z.
Also interesting to me: at the time of this writing, “millennials” are between 20 and 36 years old. I’ve taken a lot of the “kids these days” complaints about millennials to refer to teens, which would more accurately be Generation Z. Ironically, those born on or after 2000 are not millennials. (I used to assume the term referred to those born this millennium.)
For the purposes of this list, “Western world” can be taken to mean North America, Europe, South America, and Oceania. However, it should also be noted that many variations may exist within the regions, both geographically and culturally, which mean that the list is broadly indicative, but necessarily very general.
It seems that virtually no one agrees on exactly where a generation ends or begins, so you’ll see several years of variation depending on the source.
For a while now I’ve read about software-defined radio (SDR), but as an academic pursuit, or as something very expensive. It turns out that I was way misinformed, and you can get in on the fun for $25 ro so as long as you have a computer with a USB port.
As the story goes, tuners like these were originally cheap USB TV tuners. They cut costs by doing much of the processing in software instead of hardware. And, well, that’s software-defined radio! The fact that they were TV tuners had some other nice effects: the TV bands are all over the place, and each TV signal is a few MHz wide, so these are in fact broadband SDRs capable of capturing a couple MHz of spectrum concurrently. And that’s awesome for us!
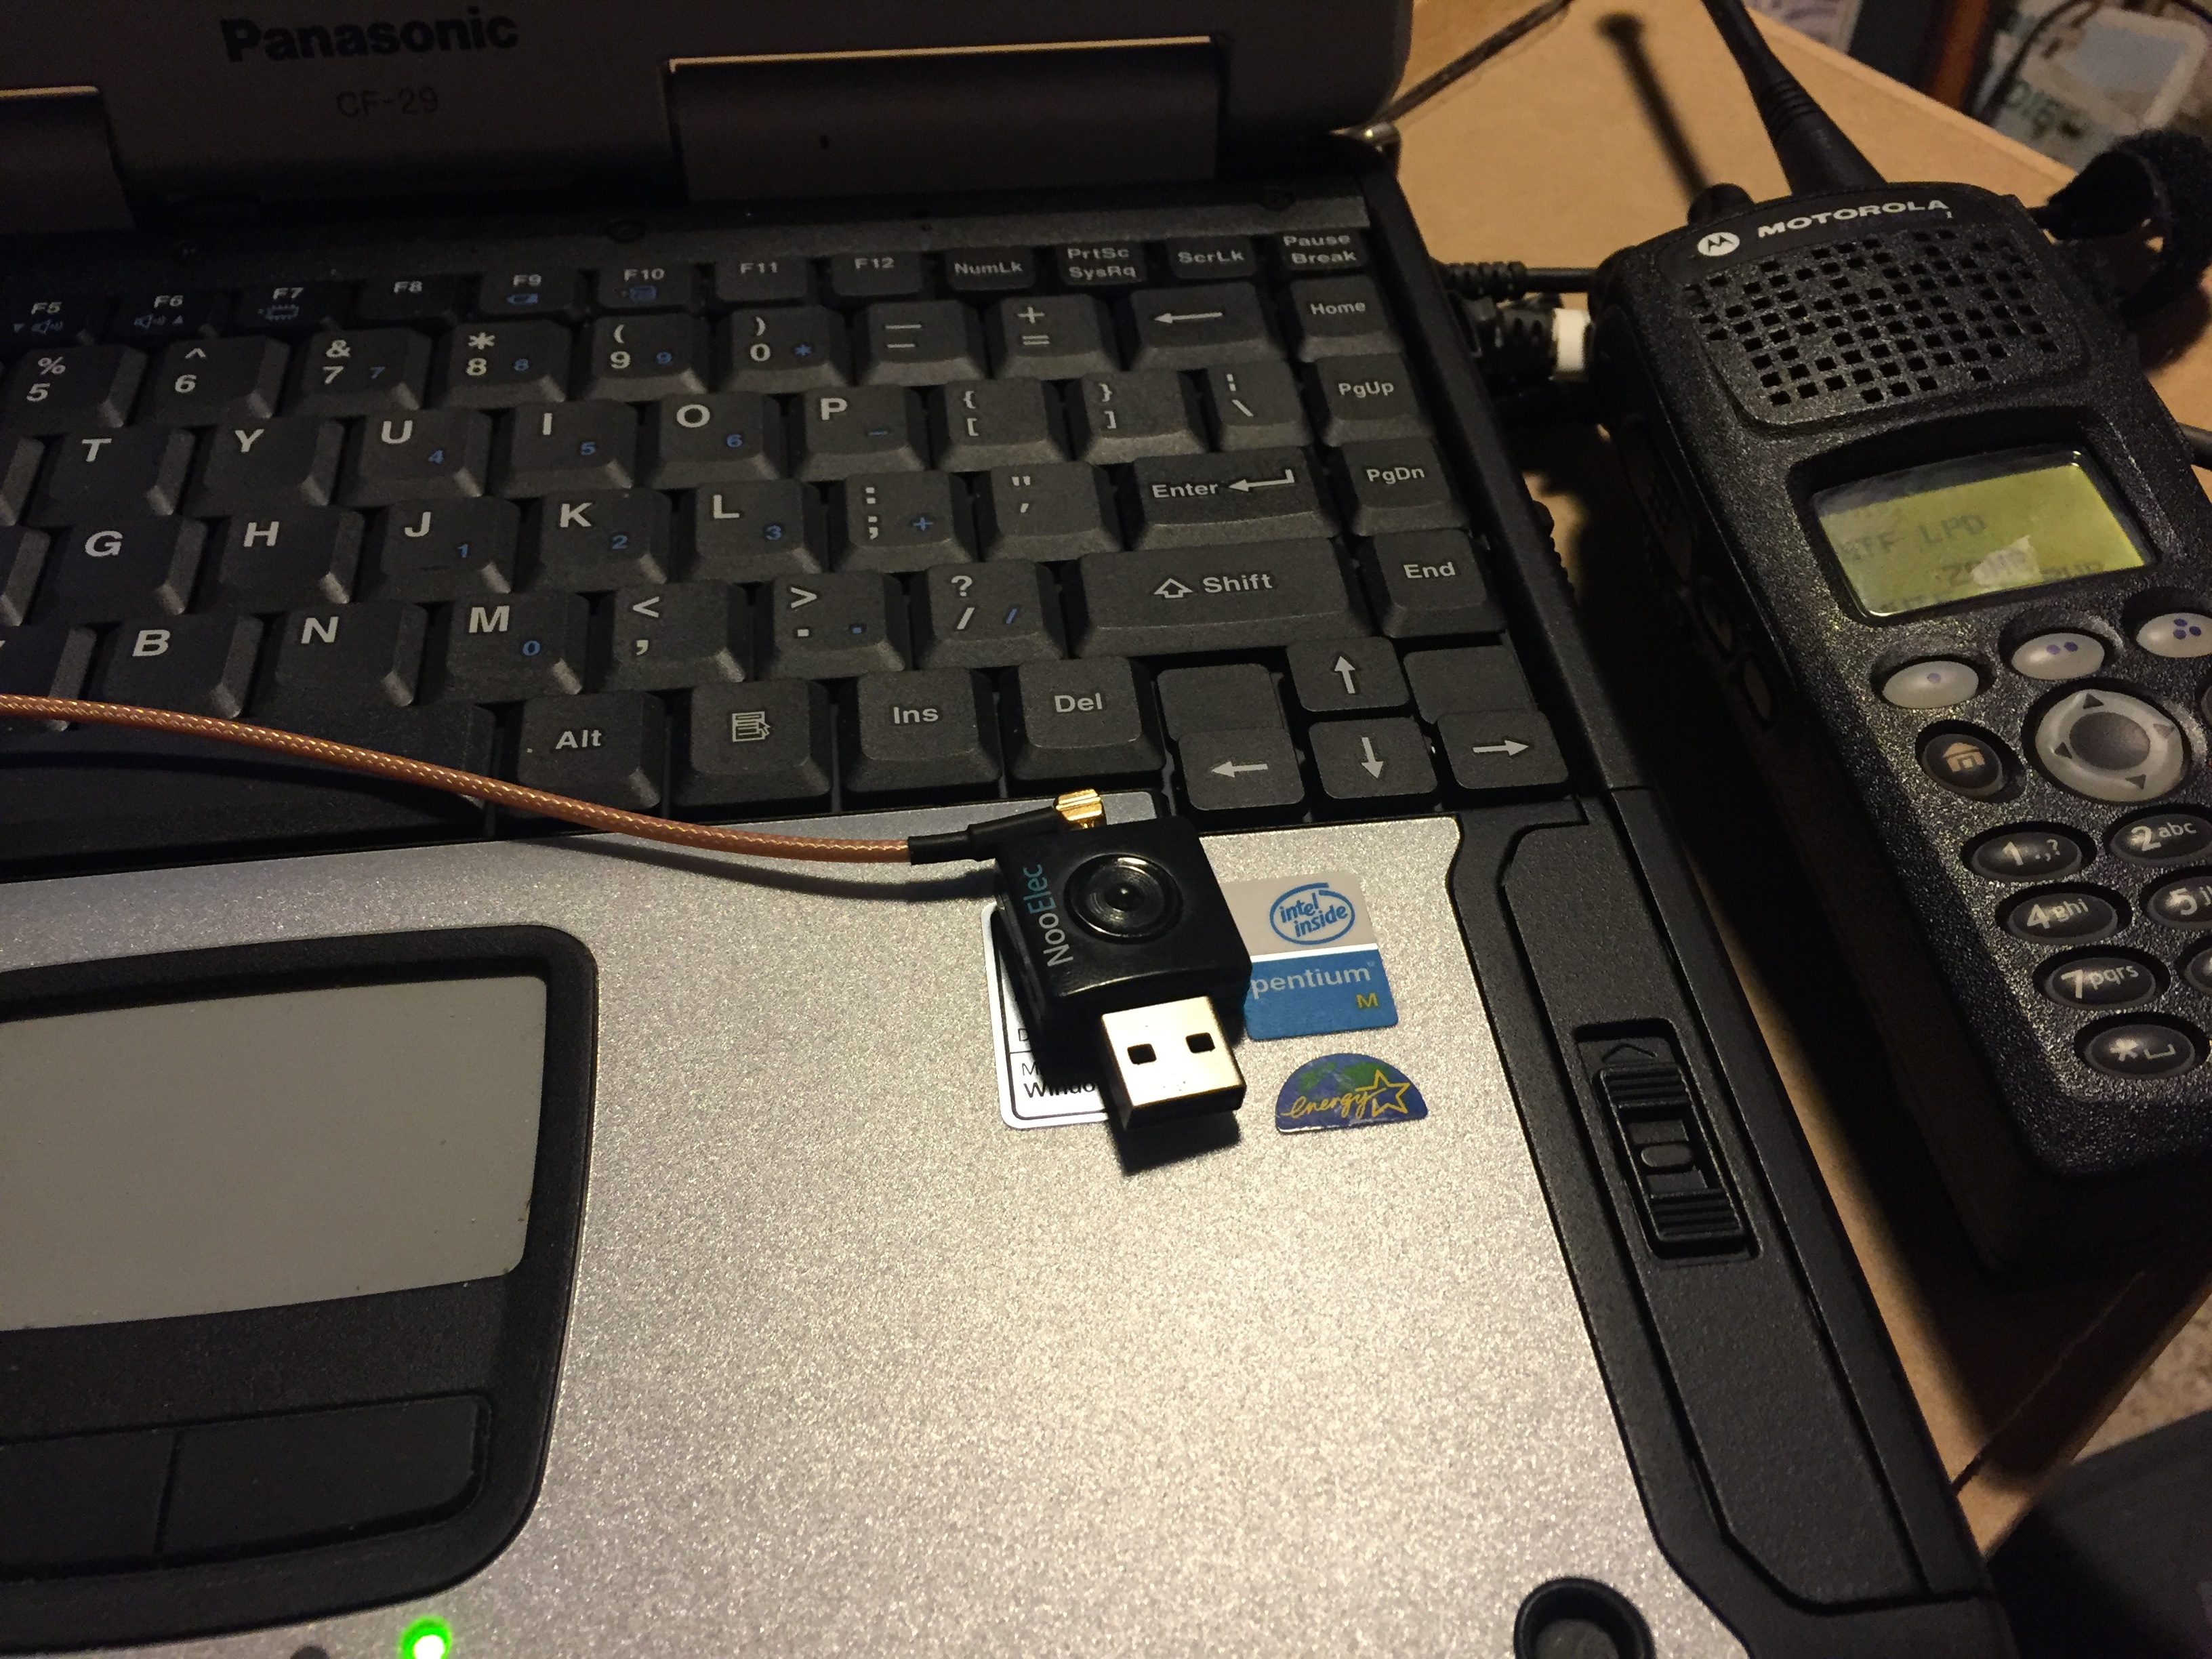
Here’s the one I have; the specific model is no longer made, but it uses the same R820T tuner that current models support:
(Sorry for the photograph of a computer screen. That’s my old radio-programming laptop that needs to stay on Windows XP, so I intentionally keep it off the Internet.)
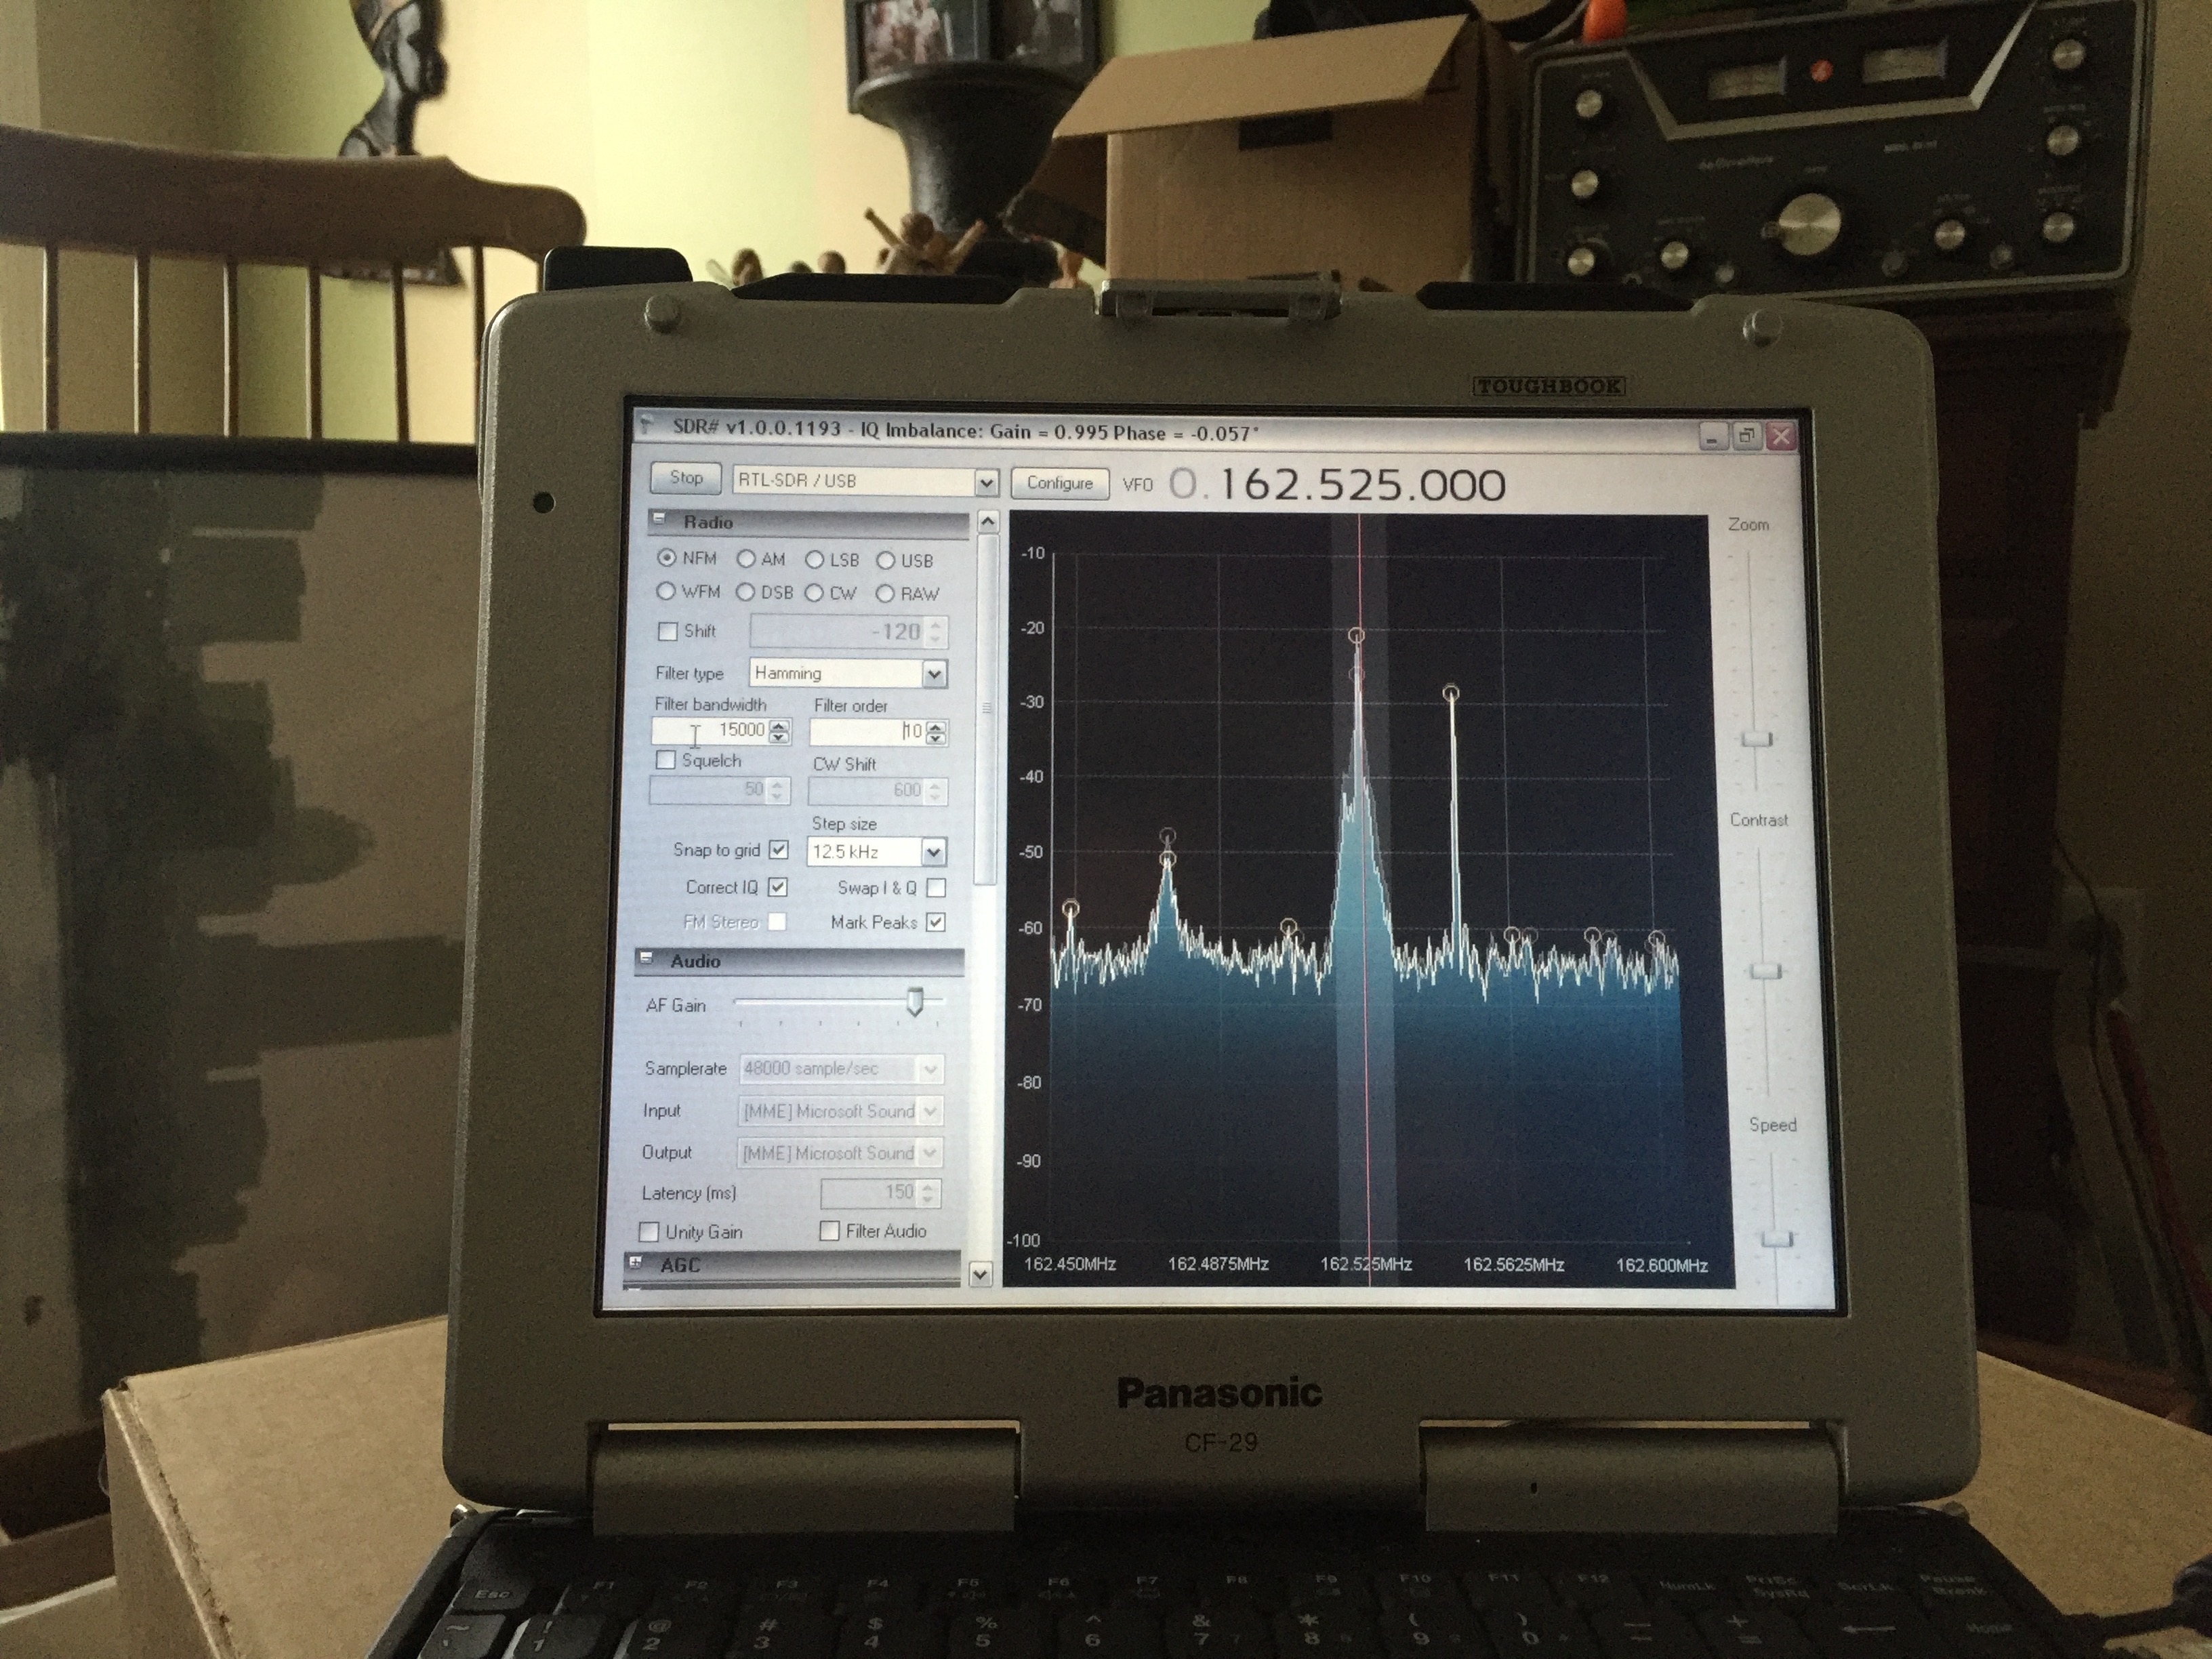
You can see it’s tuned to 162.525, which is WNG575, my nearest NOAA weather radio station. SDR Sharp is giving us a spectrum scope view, which is pretty handy.
The receiver has adjustable gain, from 0 to about 47 dB. It’s not abundantly clear to me how this relates to regular receivers; it seems like the 0 dB setting is pretty deaf compared to most of my other radios, but at 47 dB it’s definitely got some gain on the others. The spectrum scope is especially useful for seeing the effects of gain, though: as you increase gain, the noise floor goes right on up with the signal. (This is, of course, not surprising, but it’s a great visual explanation of why you don’t always want a powerful preamp.)
With the scope, you can see that, with the gain turned up, the noise floor is sitting around -65 dBm, while the weather station is up at -20 dBm. Nearly as strong off to the right is 162.55, WXL93 out of Paxton. (You’ll also see 162.475, KHB35 in Boston; as well as, much weaker, 162.45, which is KZZ40 on Saddleback Mountain in NH.)
You’re probably not particularly interested in which weather stations I can receive, but the spectrum view is quite handy.
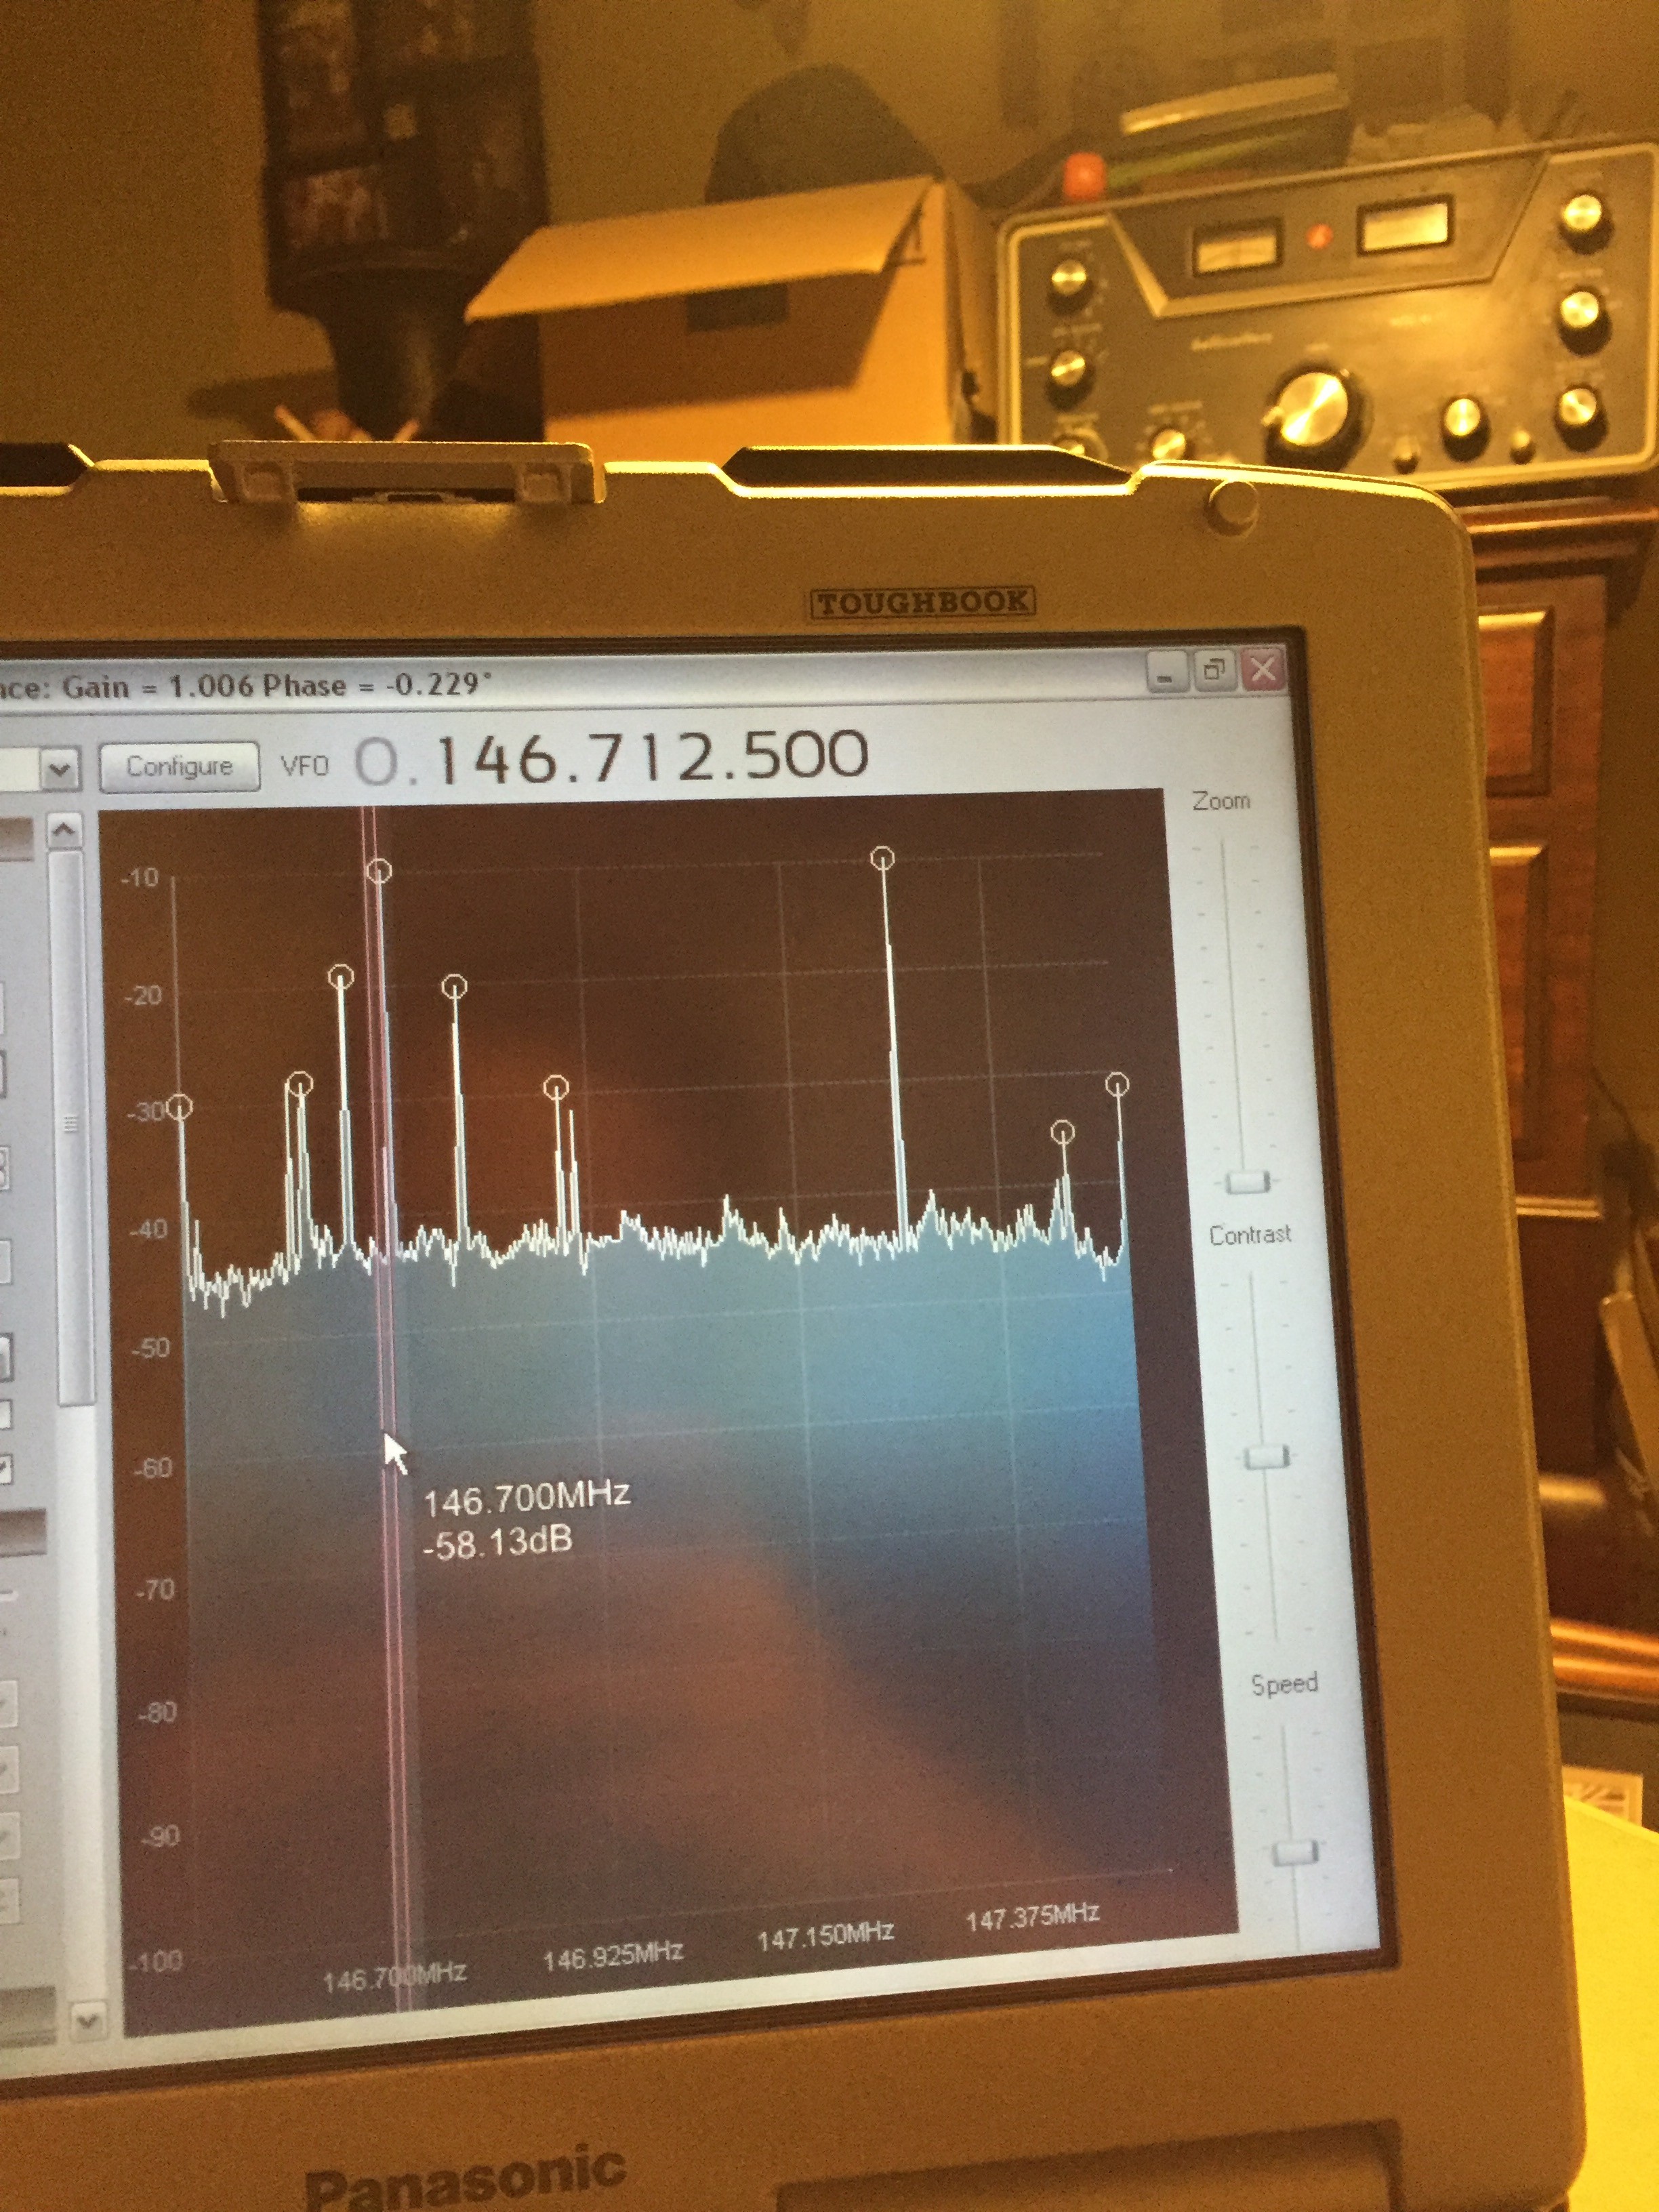
And here it is during a linked traffic net on the ham bands:
With the GP-15 I just put up, I’m seeing a number of area repeaters active — plus some noise!
The thing isn’t perfect. As an extremely wideband receiver that is so small that I could literally swallow it, it seems to suffer a bit more than other receivers with strong noise and intermod. I receive ghosts of signals in odd places on the band, seemingly related to the bandwidth I sample: at the 0.25 Msps mode, I often see images duplicated 1 MHz off their true frequency. The 0.9 MHz view is more confusing. But, for the cost, and the features that a receiver costing 20x as much doesn’t offer, I’m willing to put up with that.
Oh, it also gets kind of hot, especially as you crank the gain up:
SeekwareBlendModeNone
That also points to another problem, in that it often has some frequency error, which seems to vary a bit with temperature. I’ll often have to dial in about 30 ppm correction, and then back off that as it warms up. But, like the performance in noisy environments, that’s a problem I can put up with.
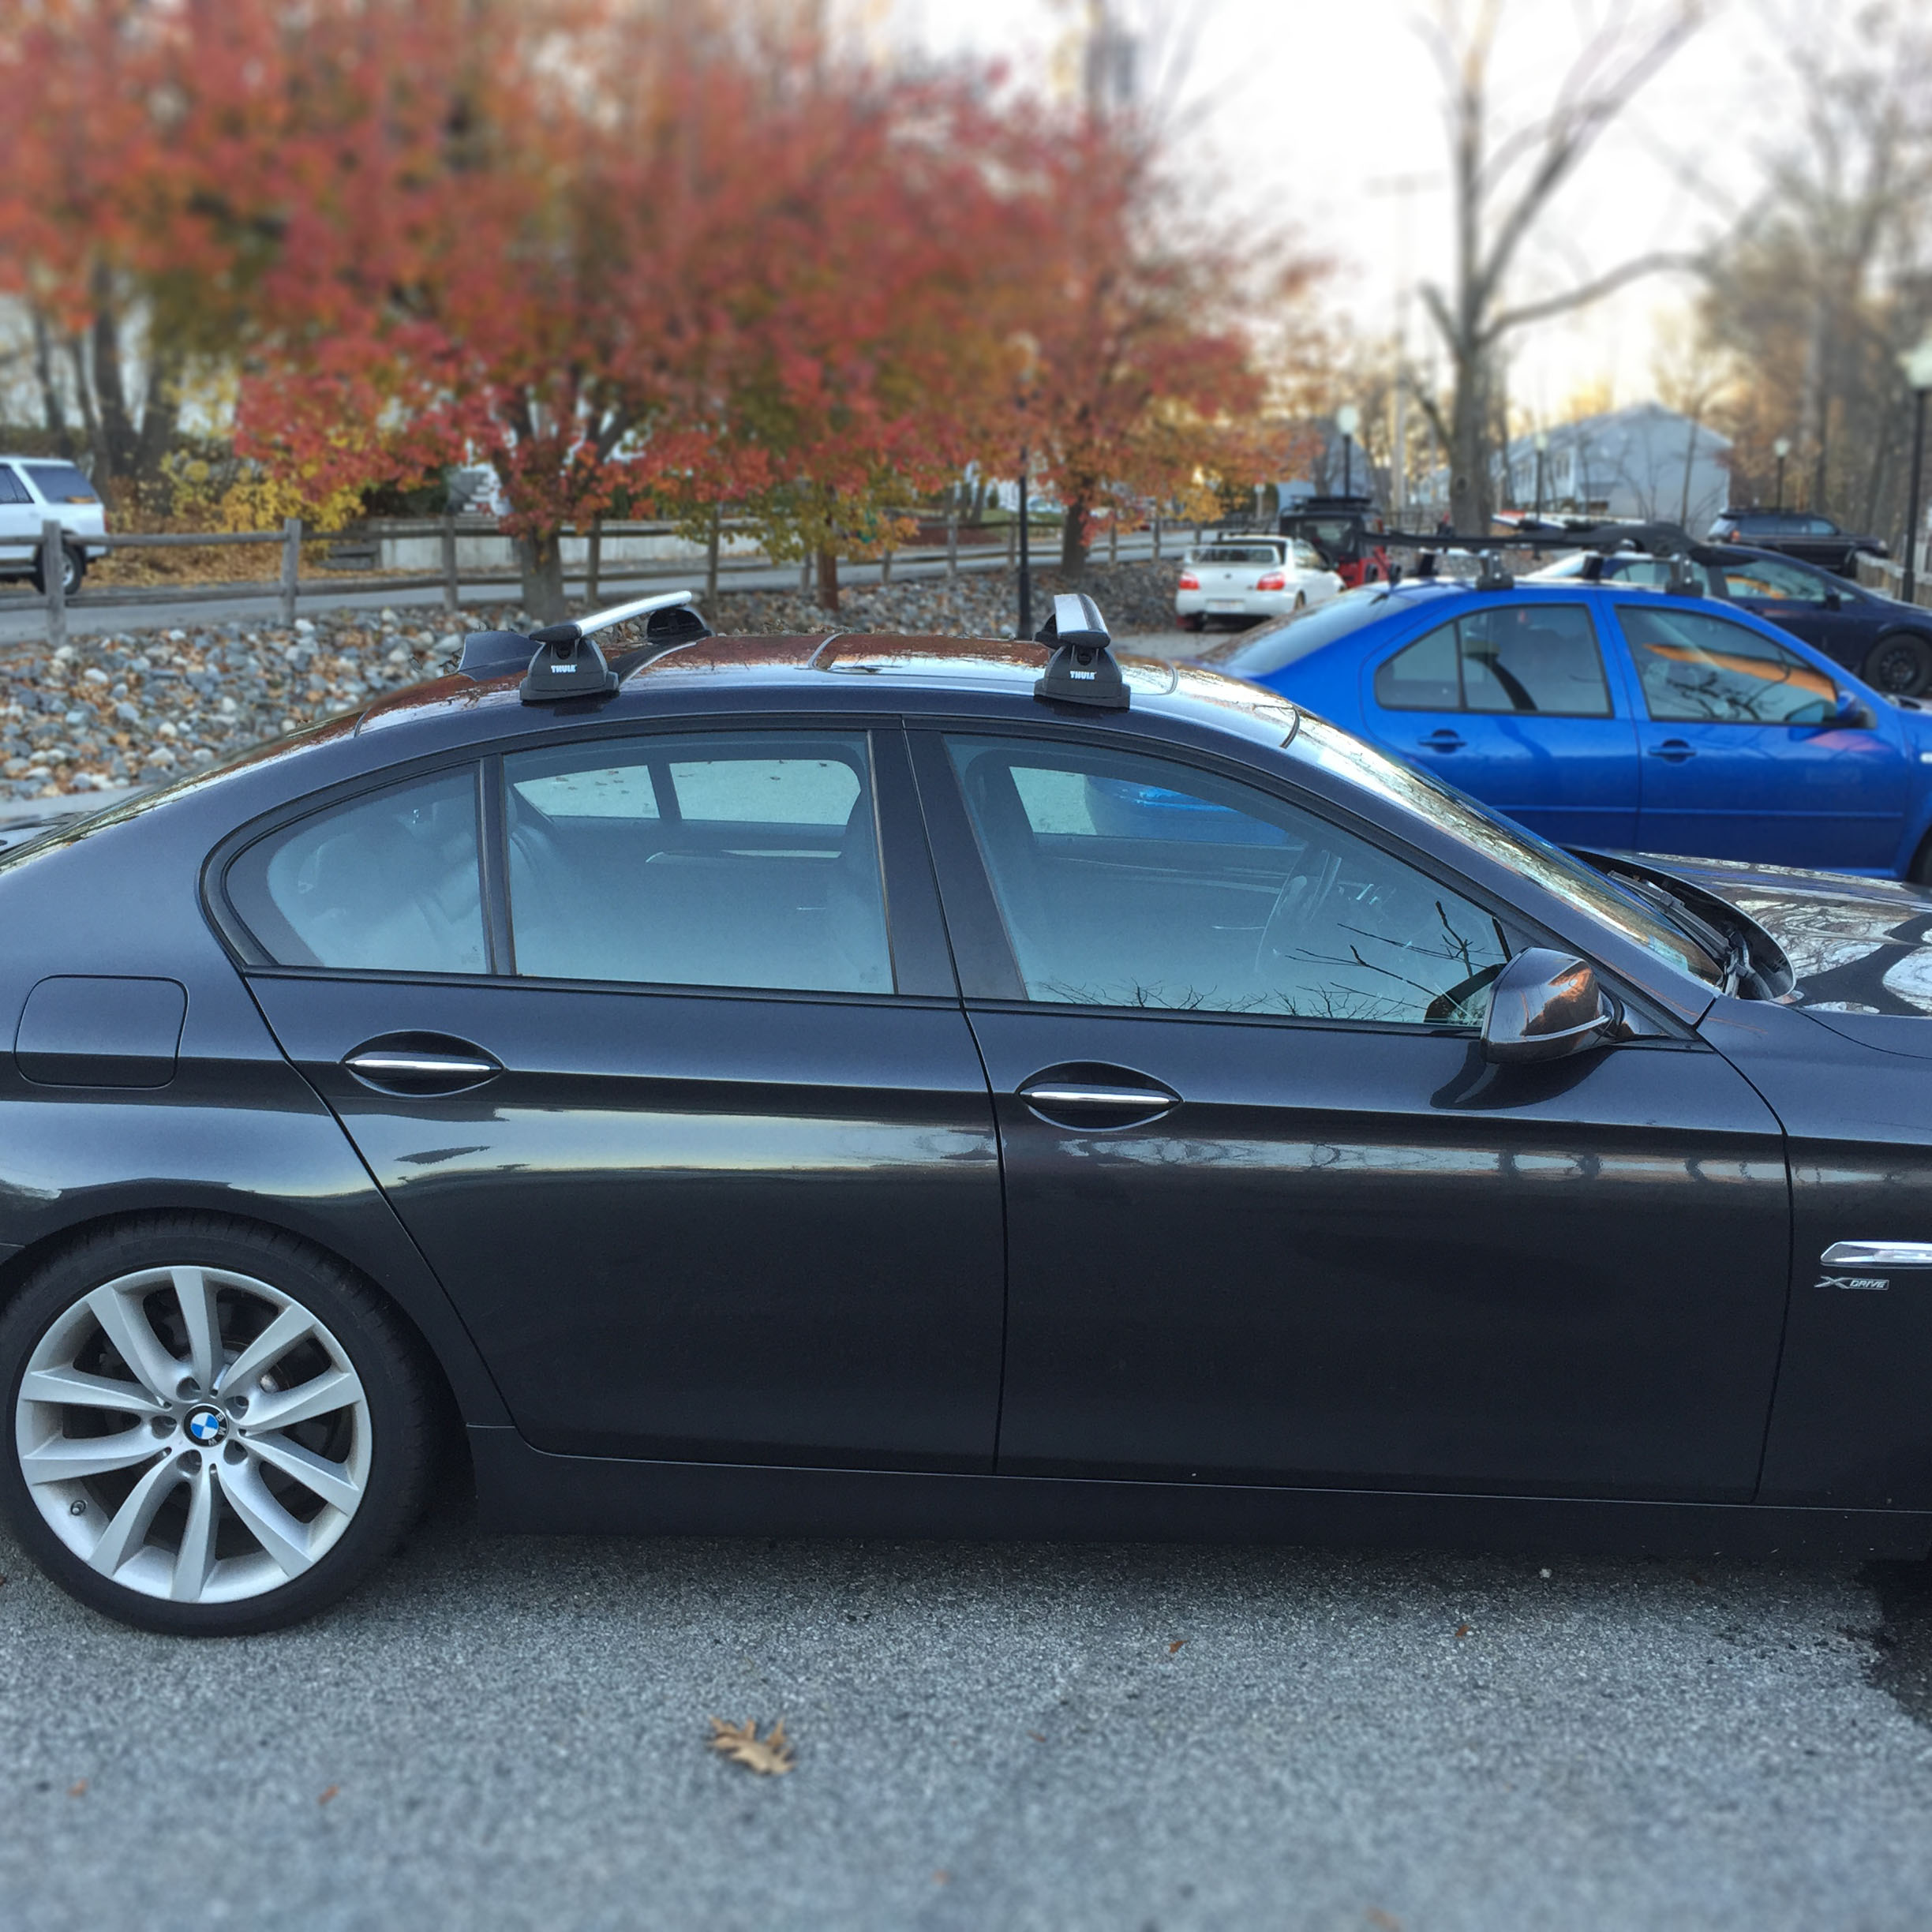
My loving relatives gifted me an Thule AeroBlade roofrack, to celebrate me turning really old and also no longer having a car large enough to shove a Christmas tree in the back of. I figured I’d document the process, for my sanity when I go to repeat this next year, and for anyone else who’s looking at installing these.
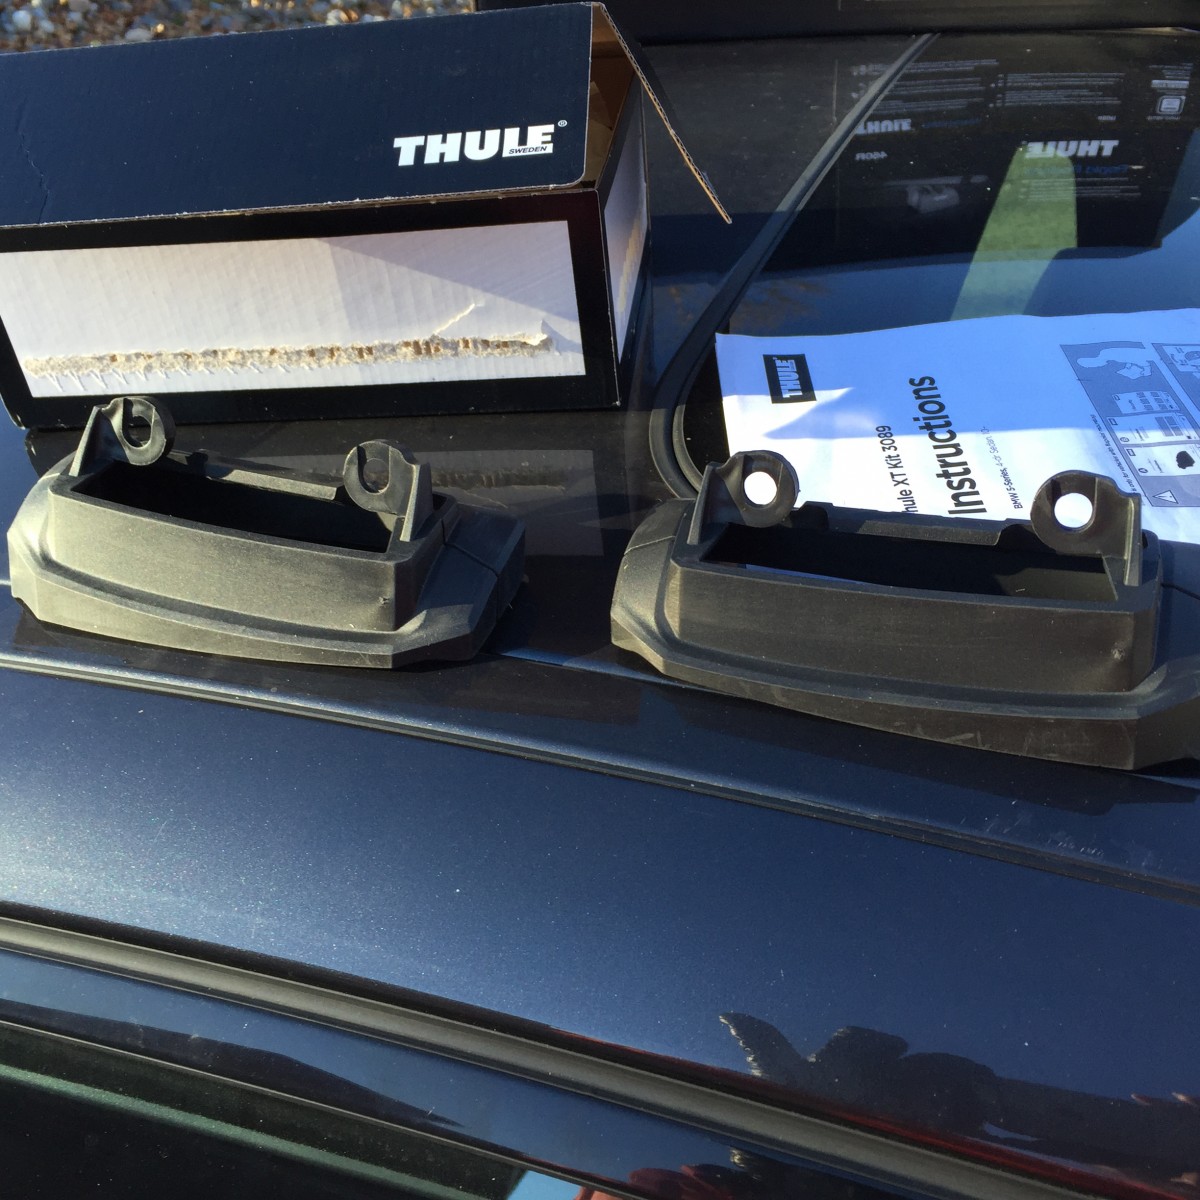
My car’s a 2012 BMW 535i, a member of the “F10” series/class. I believe all of the 2010/2011 and newer 5-series cars will fit into that category. The Thule assembly for this model came in three separate boxes:
ARB47, Thule AeroBlade, 47″, “load bars” — the actual roof rack bars.
460R, Rapid Podium, the base onto which the load bars attach
Kit 3089, the vehicle-specific kit for securing to the roof.
Going wrong
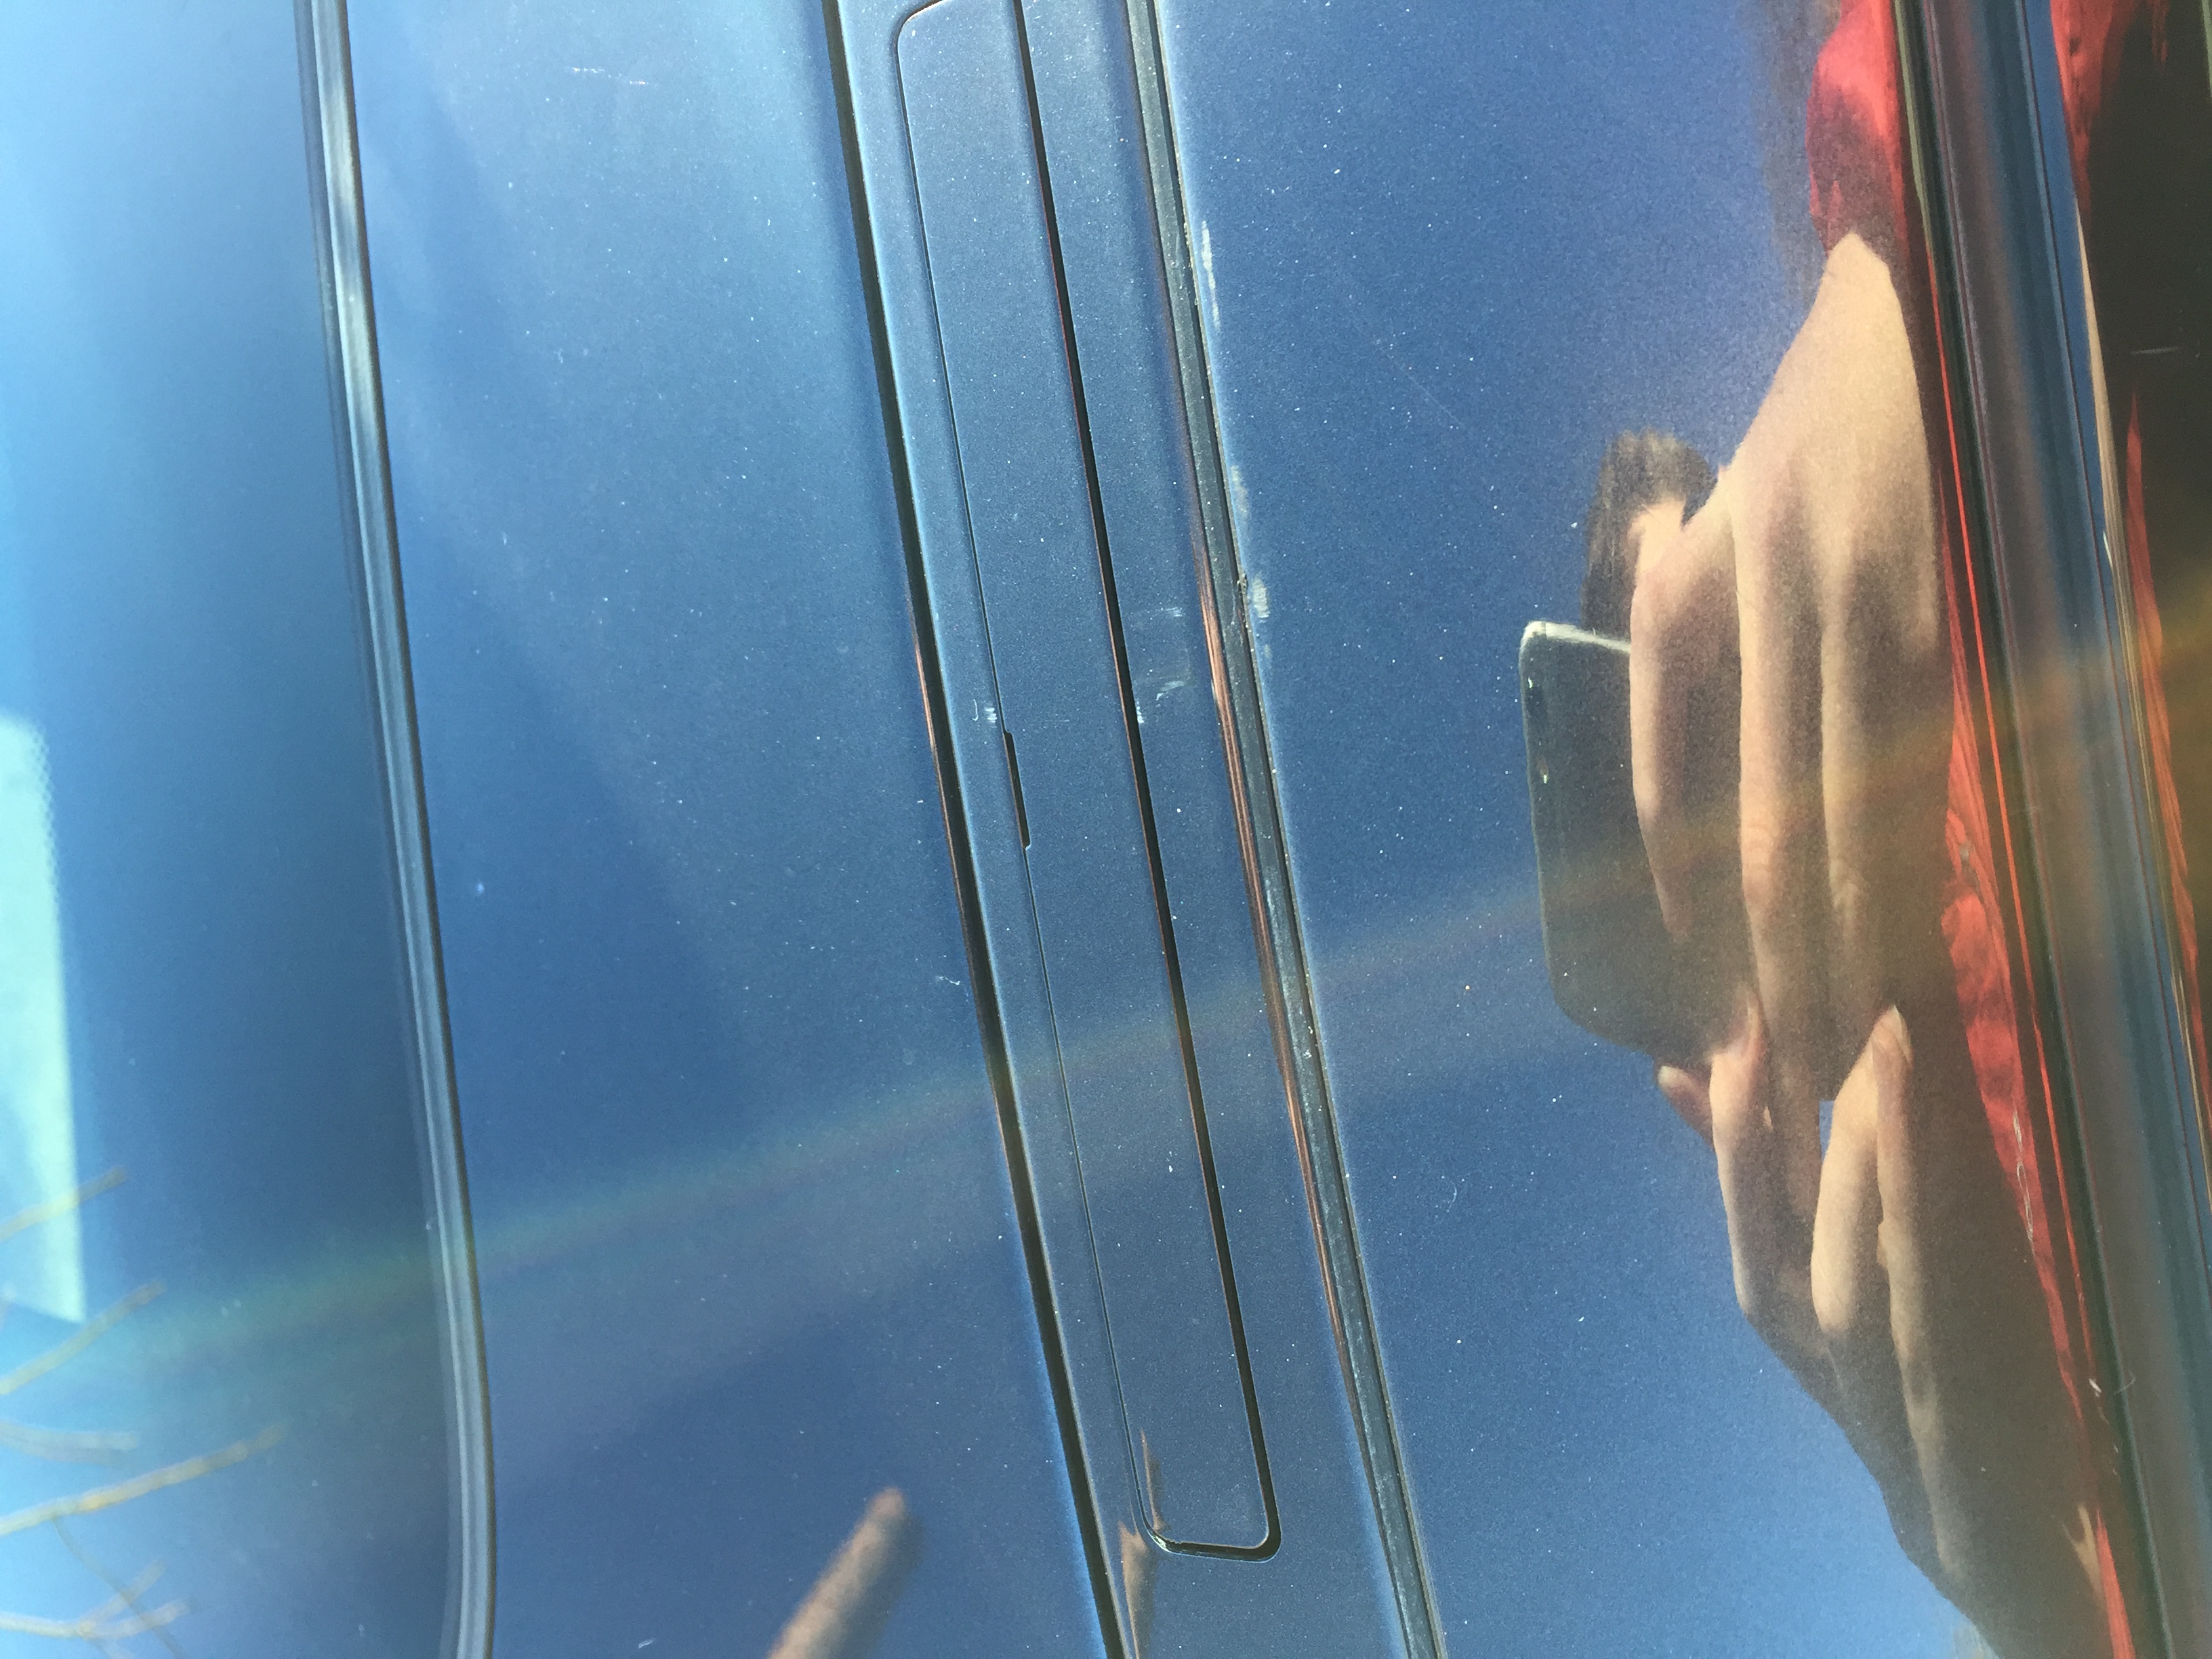
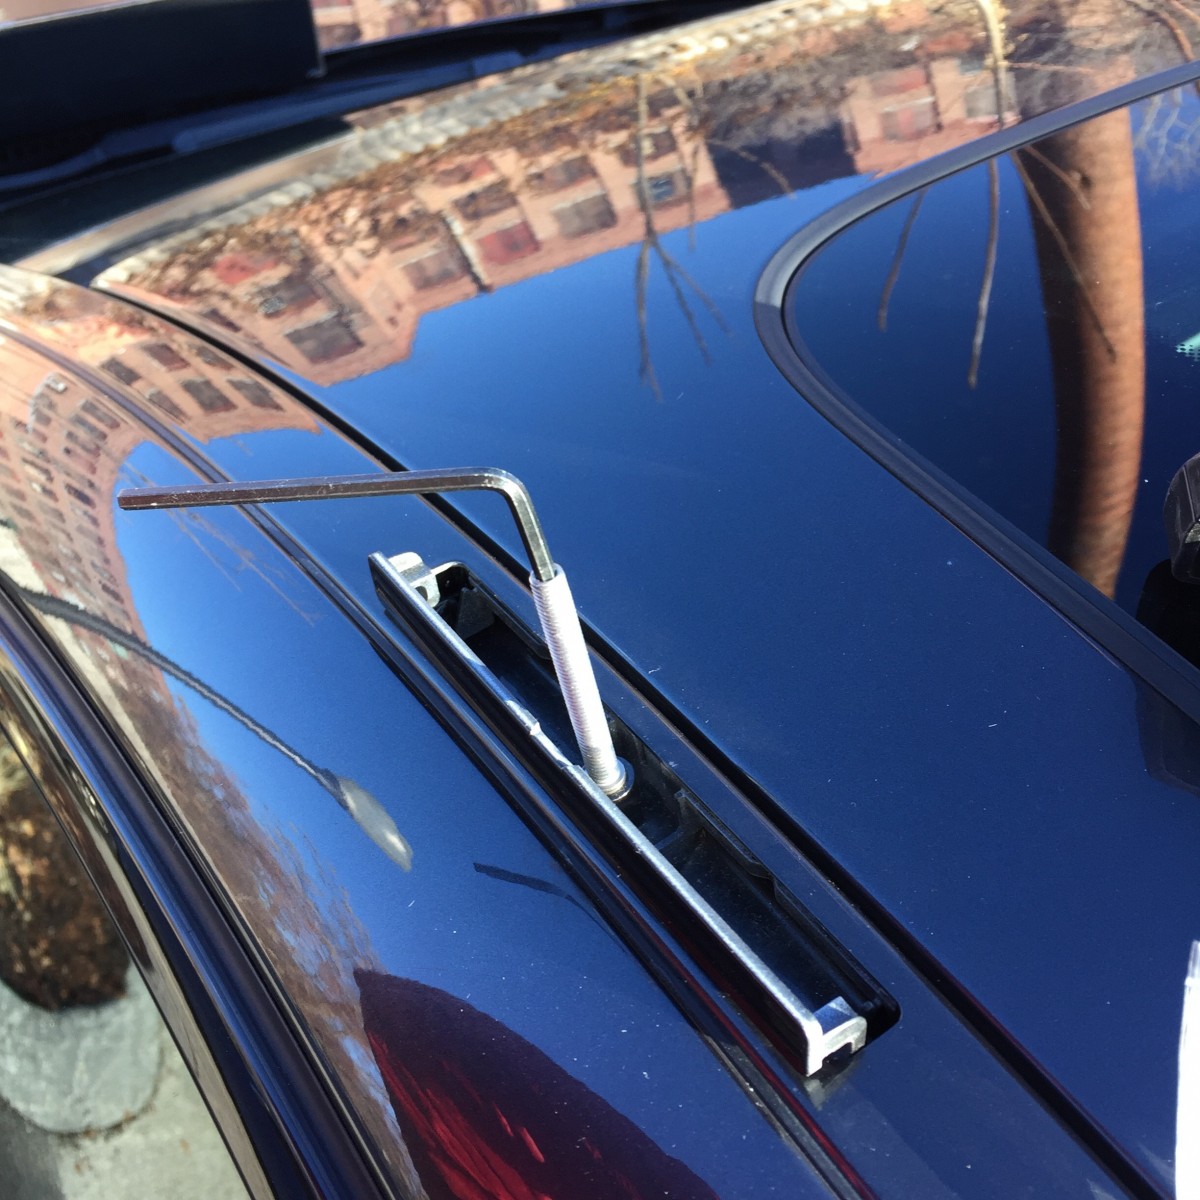
Because I’m a guy, I started by assuming I didn’t need the directions. I mean, how hard can it be? The car even has these flip-up mounting points:
My plans were quickly foiled when I realized I hadn’t even started with the right box of equipment. Apparently, there’s a reason they include the instructions.
Overall plan of attack
What was totally unclear to me when I was figuring all of this out is that you really can’t just do one box at a time. You can mostly install the vehicle-specific kit first, but then you start needing to meld the other kits together.
The rest of the post will go into much more detail, but you’re going to want to accomplish the following.
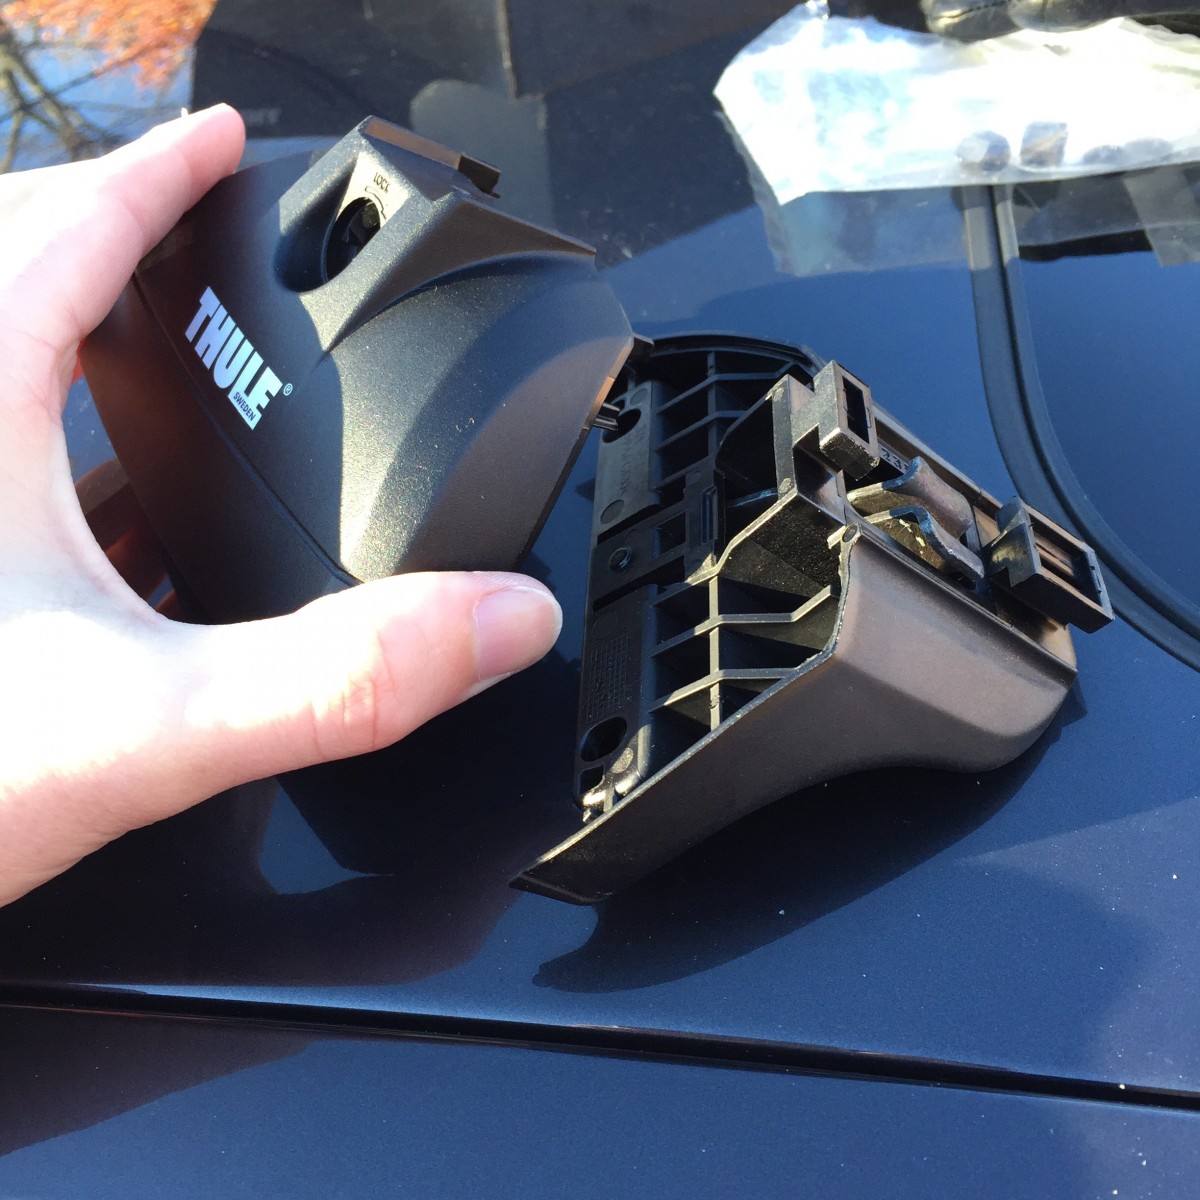
First, you’ll install the vehicle-specific mounting kit, “Kit 3089” in this case. This will leave you posts the rest attaches to:
Finally, you’ll attach that whole mix to the mounting kit you bolted to the car in the first step.
Car Mounting Kit
Have you ever assembled something from Ikea? You know how the illustrations give you a vague sense of what you want to accomplish, but don’t quite tell you how to get there? That’s how I felt the whole time I was doing this, and then I realized that Thule and Ikea are both Swedish companies. Having a little Swedish ancestry was insufficient to intuit what they meant some of the time.
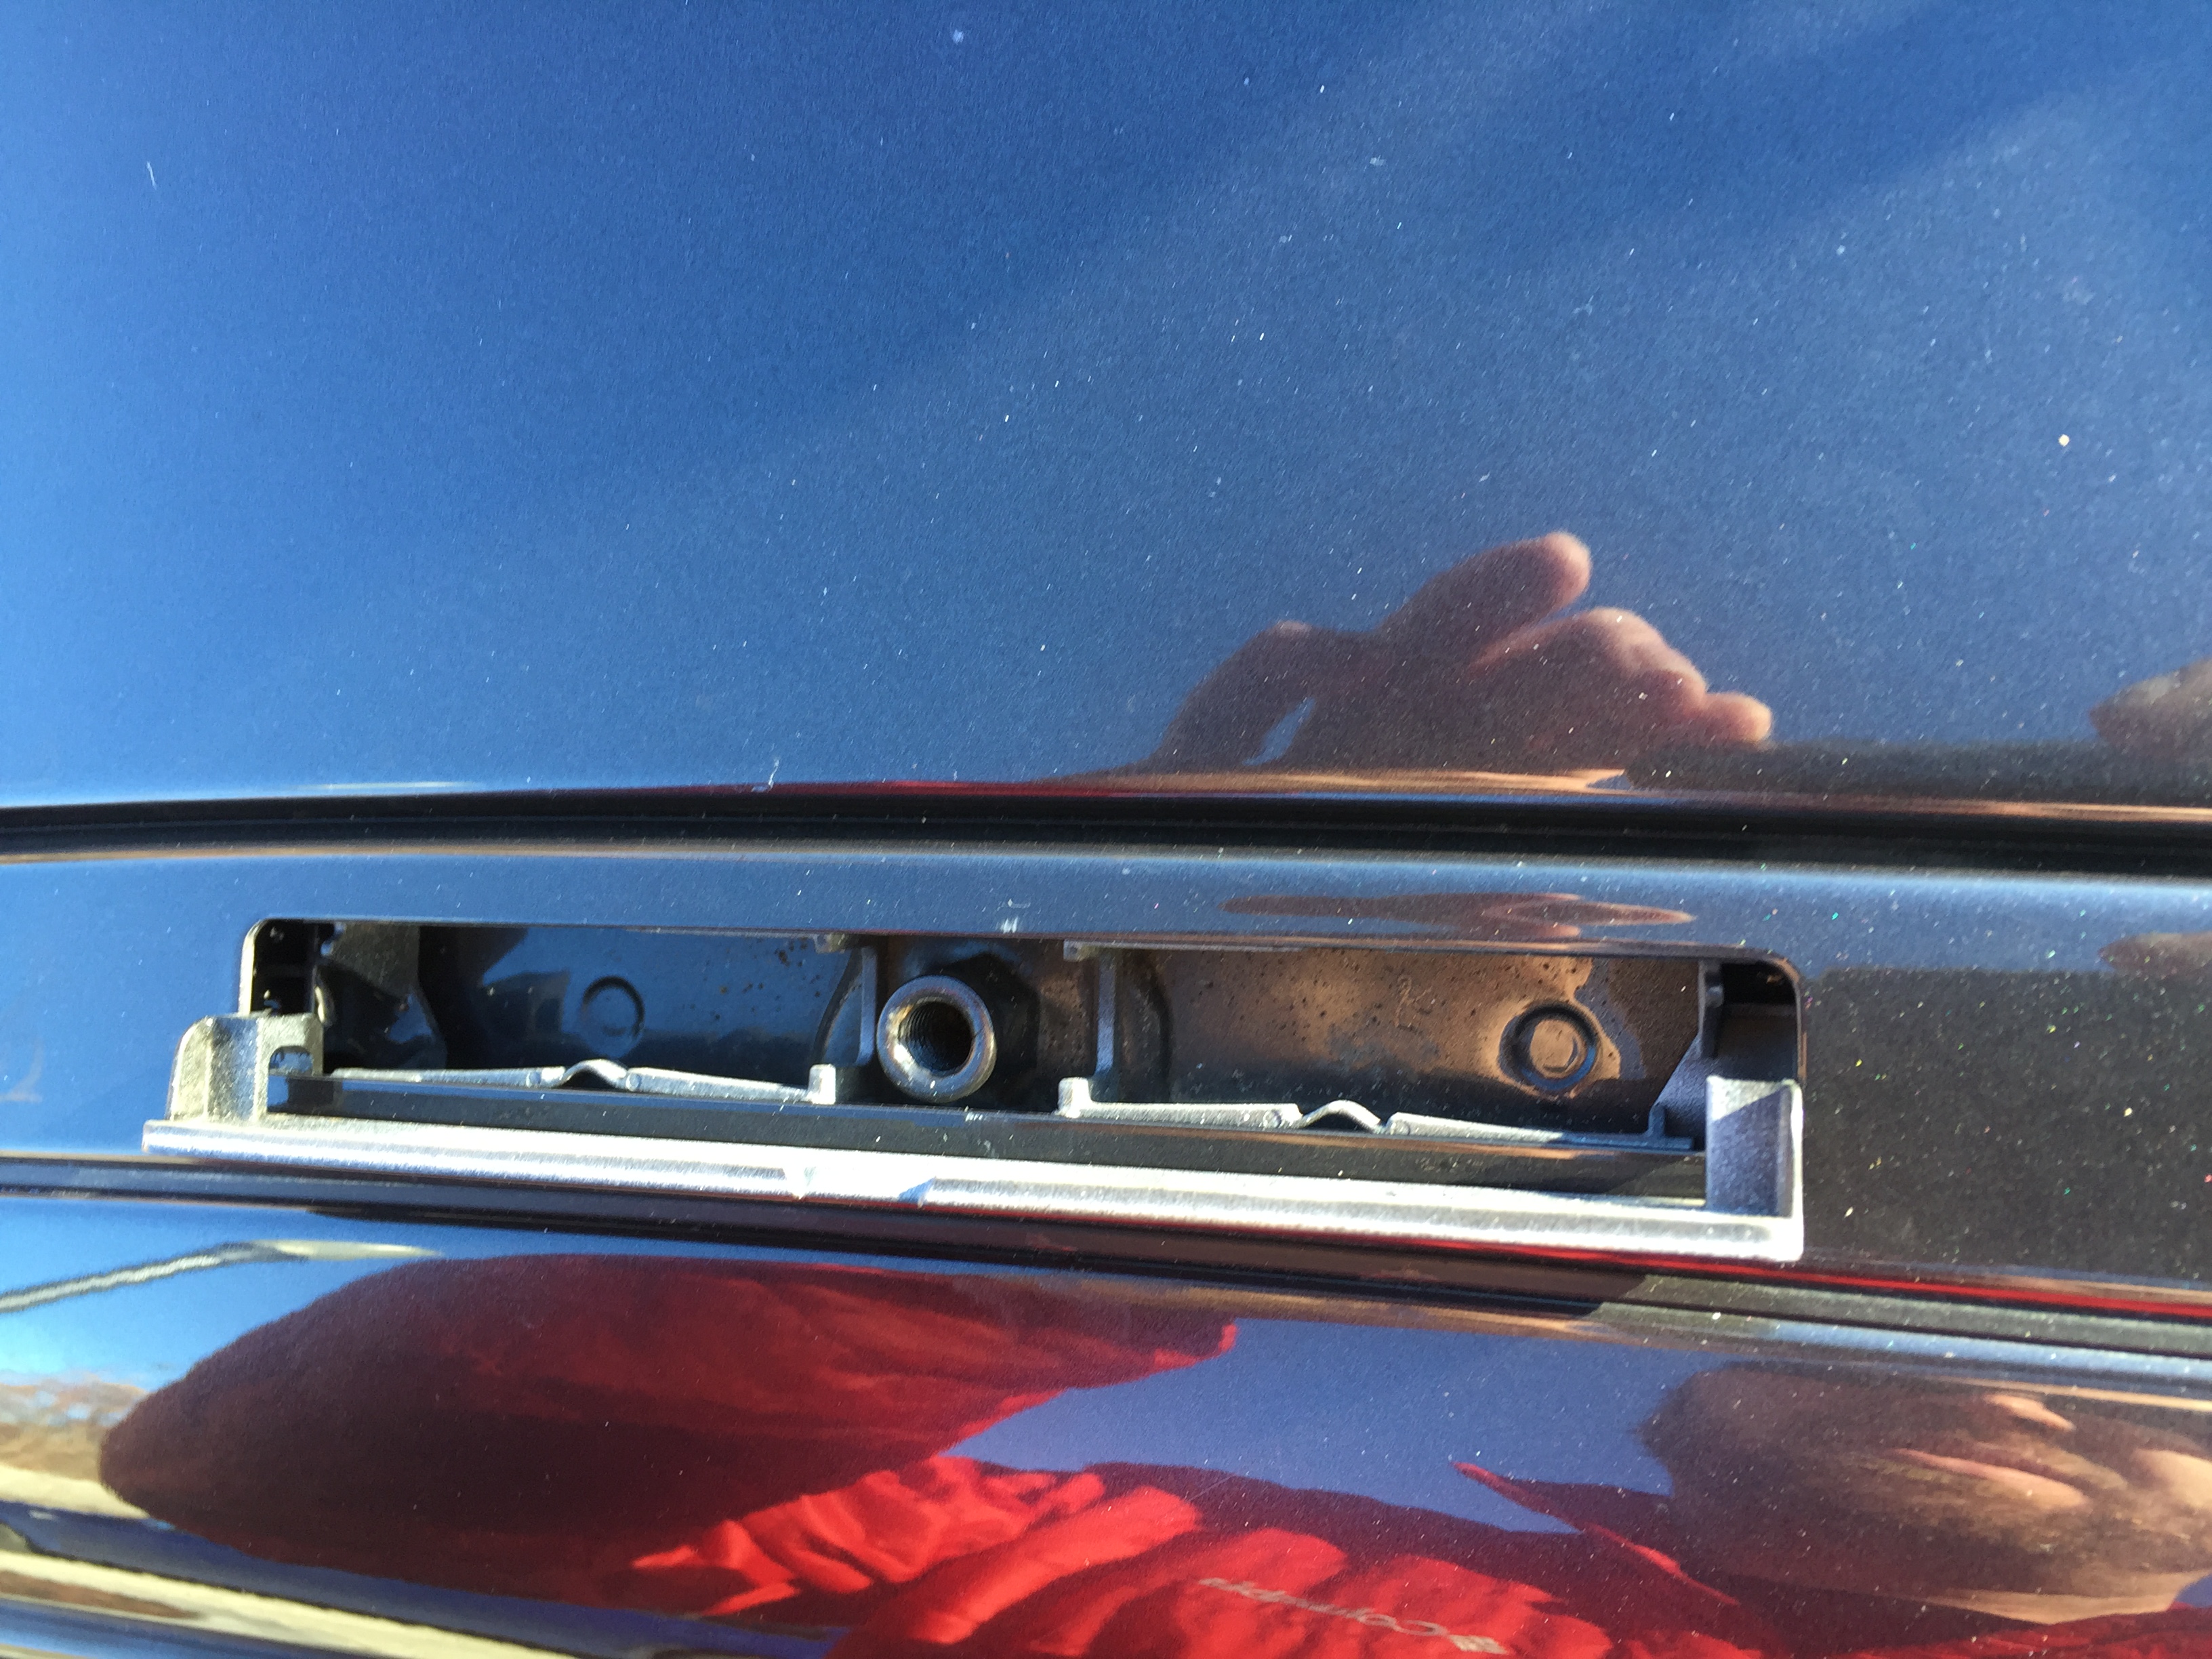
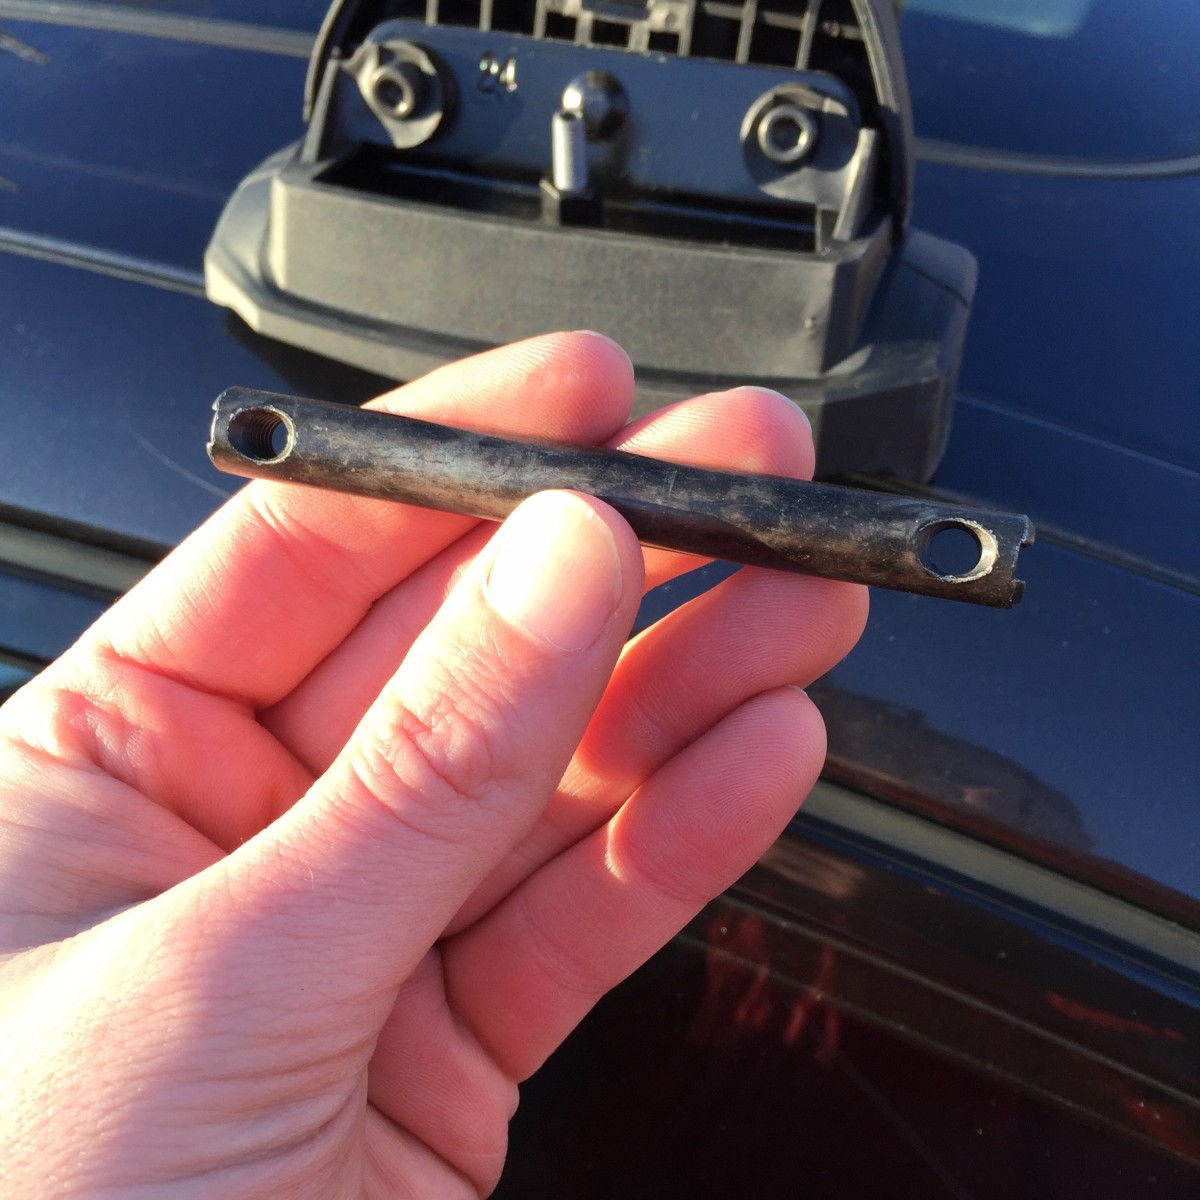
First, screw these bolts into each of the four mounting points on the roof. The mounting point covers on the BMW swivel up to reveal the sockets, but don’t come off. That’s fine; you don’t need them to. One end of the bolt is wider in a small section; that’s the bit that goes into the roof screw-holes.
You screw that in with a larger 5mm hex bit, and then unscrew it, leaving pristine threads. I didn’t see a 5mm bit in the box, but there was one in the Rapid Podium box. That die is only to fix the threads; it doesn’t stay in the car.
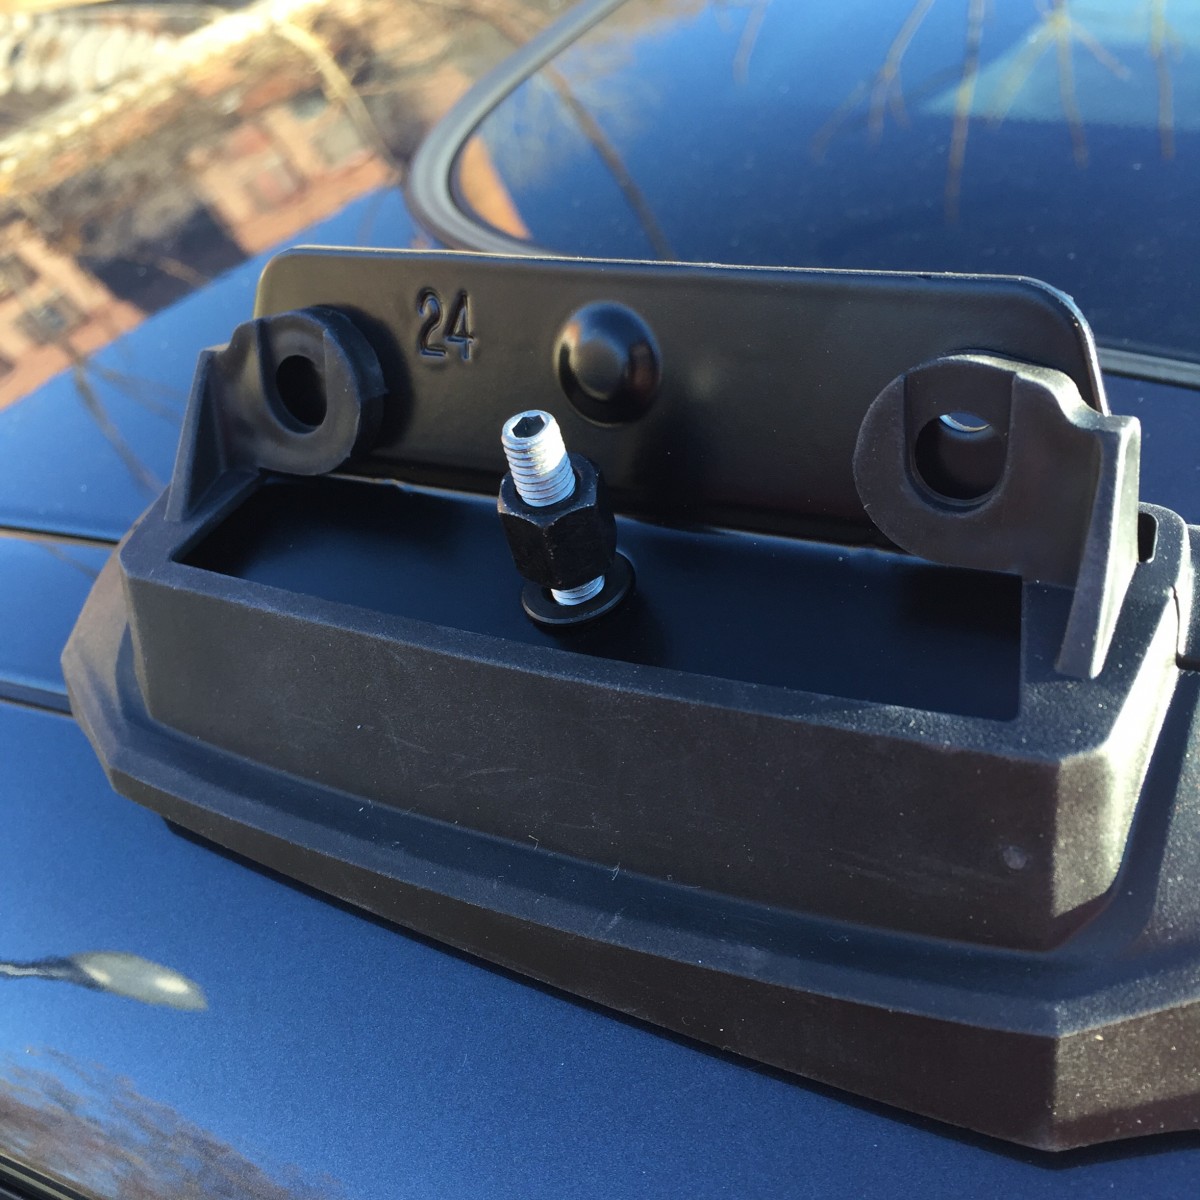
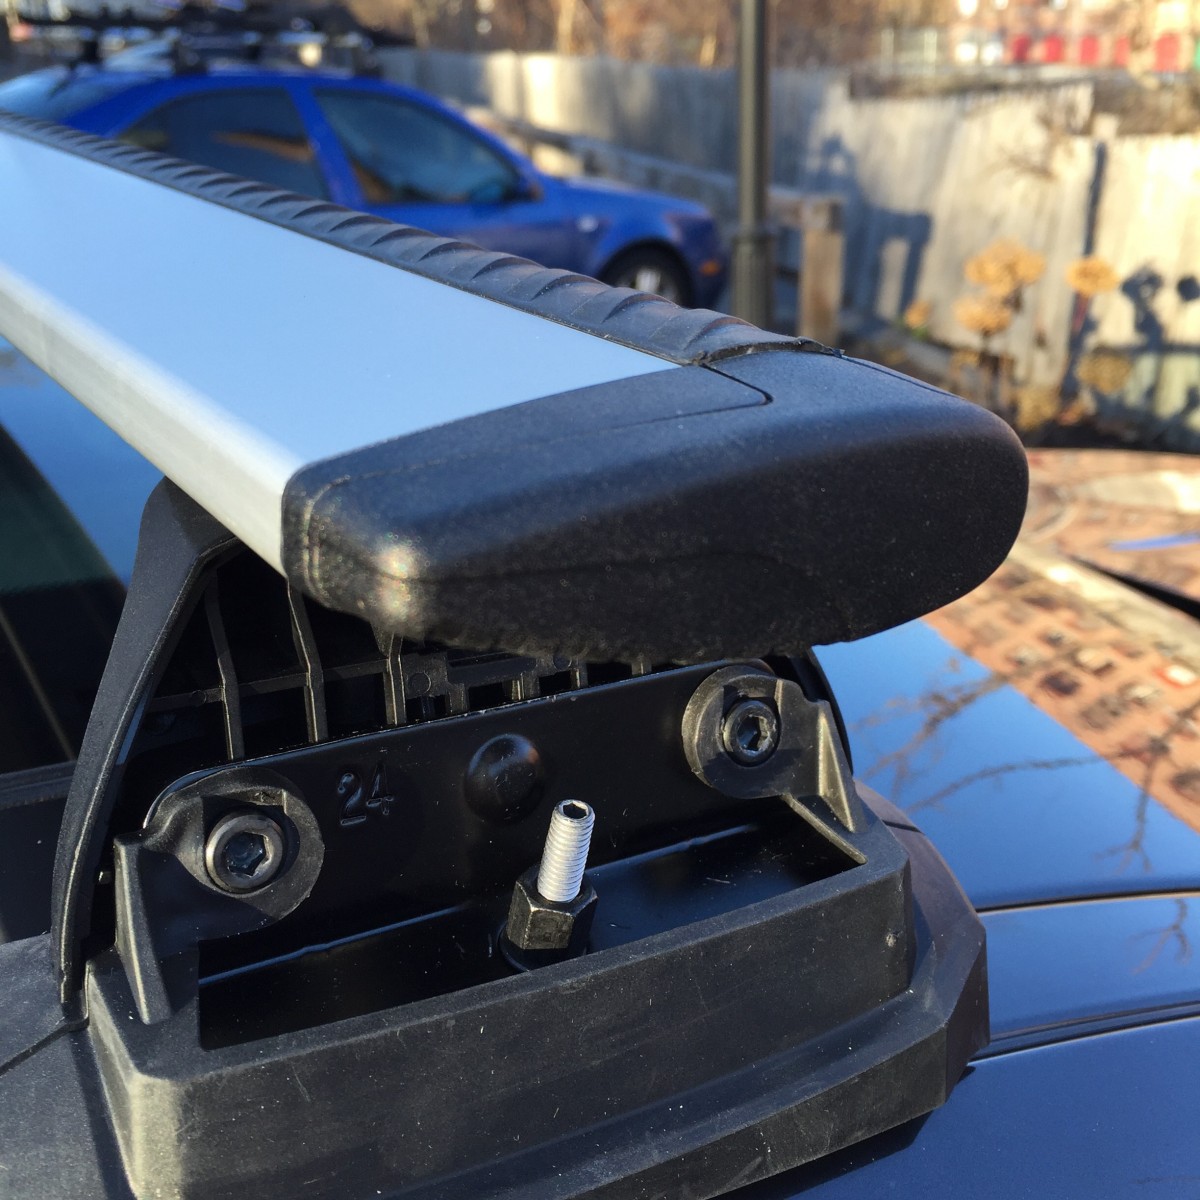
Place them on the bolt, with the “24” facing you, so that the back angles away from you. Secure it with a washer and nut from the package. Also, place the rubber boot over it, like so:
Note that this whole assembly is going to look ridiculously crooked. That’s normal; the other pieces are angled to make it all work. I never got the rubber boots to sit quite flush.
Partly assemble the load bars
All you should do at this point is put the long rubber strip in the top. Note that it has little feet that snap into the channel. Don’t attempt to thread the whole thing inside. (If that last sentence means nothing to you, that’s good; it means your mind didn’t even conceive the bad idea I had for how it was supposed to go together.)
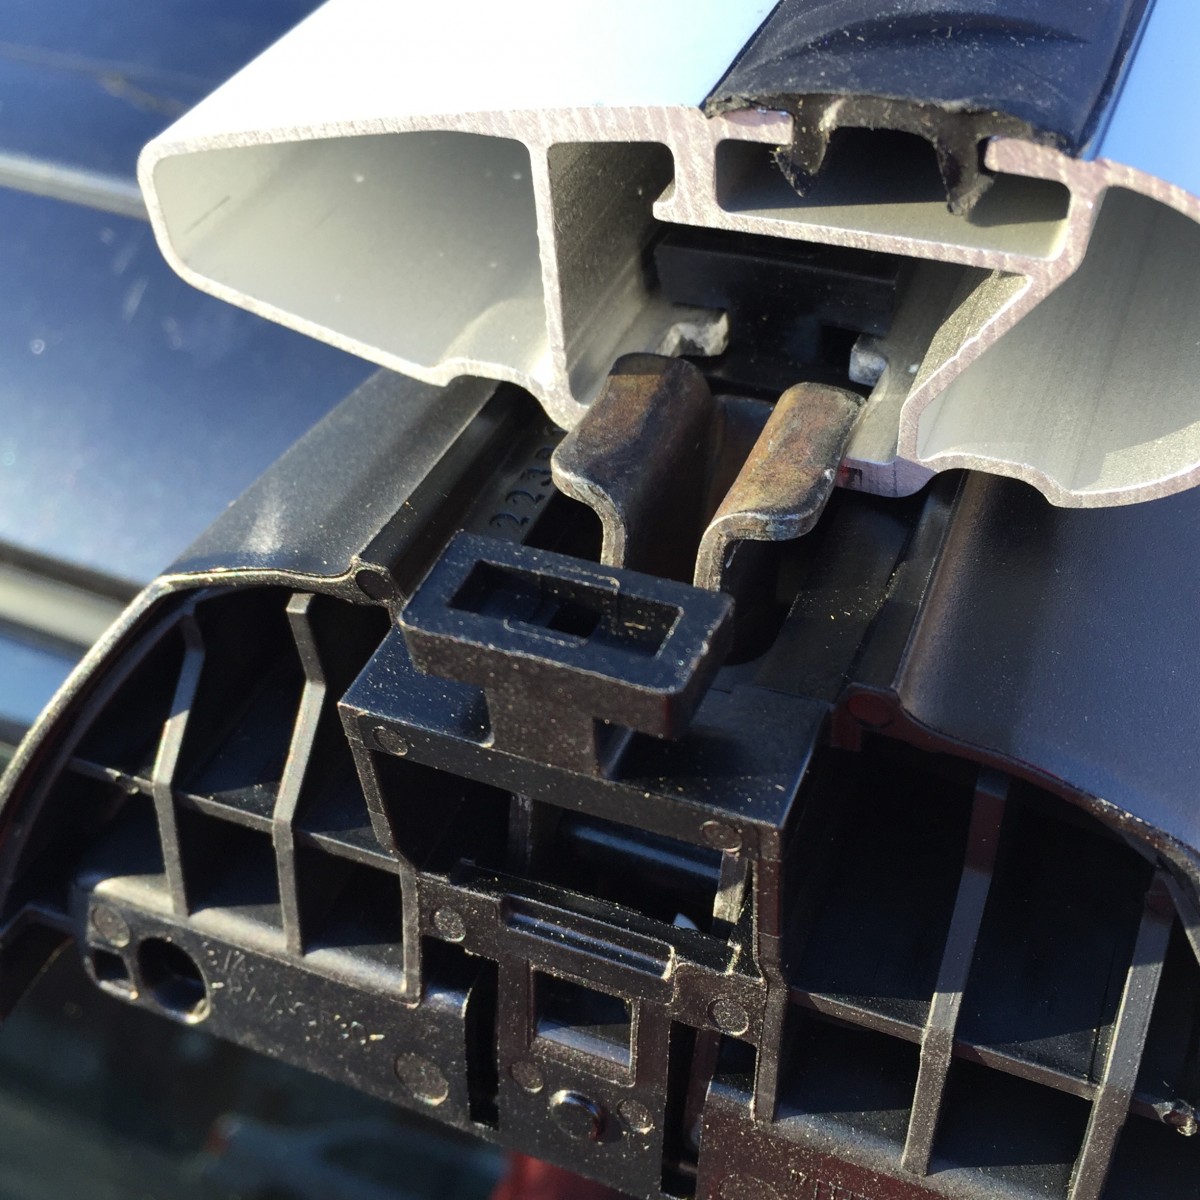
The underside of the load bars has an adjustable piece to set how far in the mount goes. I only needed to push it in 2-3″ on each side to get it to fit. The goal is to put the podium mount on each side, and get them loosely matched to fit the bases you installed previously. You’ll quickly find that the podium mounts don’t always want to move. There’s a locking mechanism. Looking at the underside of the bar, it’s this thing:
Pull that inward (towards the center of the bar) to allow it to move; push it out to lock it in place. The nice thing is that it keeps things from falling apart as you maneuver it.
Your goal right now is not to get it mounted, only to size it appropriately. It takes a bit of fiddling, especially trying to make it proportional. Mine ended up a little off-kilter. It bothers me a lot, but not enough to take it off and do it again.
Note that the Rapid Podium pieces only come to the inside of the vehicle mount; they don’t sit on top of it. Like this:
Don’t put the bolts through yet, however. All you’re doing right now is a dry fit to get the mounts set at the right points.
Mounting the bars
You should basically be at the above step, minus the bolts. So now, go to install those bolts.
This is by far the most frustrating step. It took 70% of my time and caused 90% of my irritation. If you can’t get the bolts to thread through, I found it easiest to just cast the whole bar/podium aside and put the bolts in first:
Then I ran the pushed through from the car mount to the podium, and then worked on sliding the metal bar back in and getting the screws to thread.
Unless you’re some sort of natural maskiningenjör, this process is going to take a while before everything begins to thread together. Once you get one of the two bolts to start to go, don’t turn it much! Immediately get the other one to thread in. Otherwise you’ll just never get it.
I found, from experience, that if I didn’t get it after a few attempts, it made the most sense to take apart and start over. Sometimes it took several tries, but aimlessly jiggling and shoving things didn’t help anything at all. Try to remain välbalanserad for this.
Also, keep count of how many times you drop a screw on the ground. A true Swede will number fewer than 20; I did not. And I dropped the wrench even more.
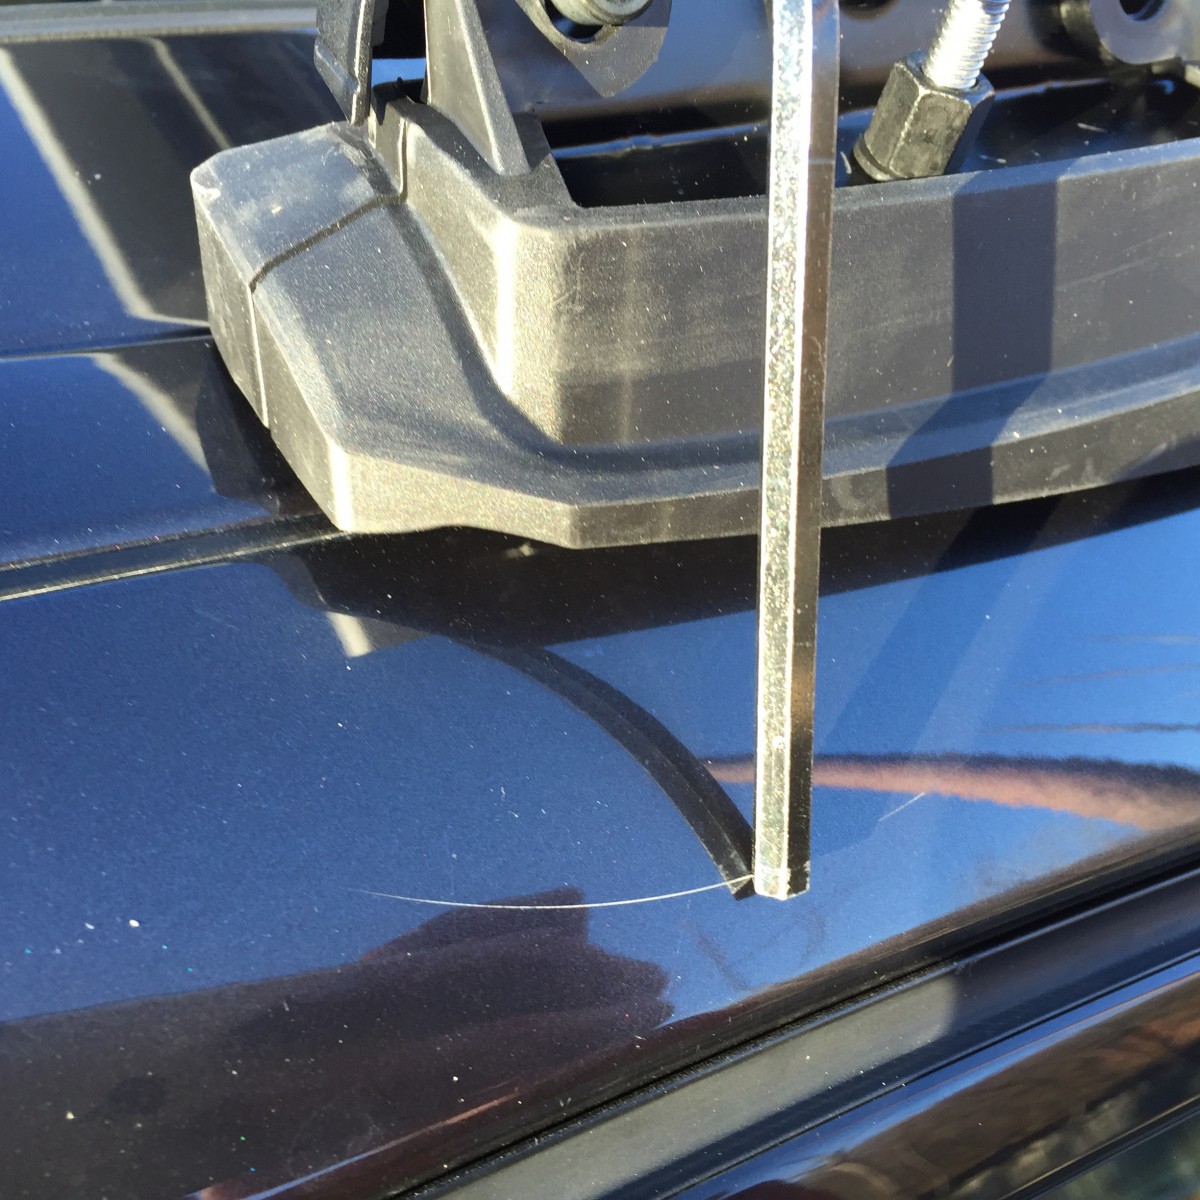
Oh, and watch out for this—it’s easy to scratch the paint with the wrench:
The good news is, I had just ordered a bunch of stuff for detailing and getting other scratches and swirl marks out, and I believe this will polish out pretty easily. But that’s the subject of a later blog post!
Once you get this step done, you’re 98% of the way there. The rest is a breeze!
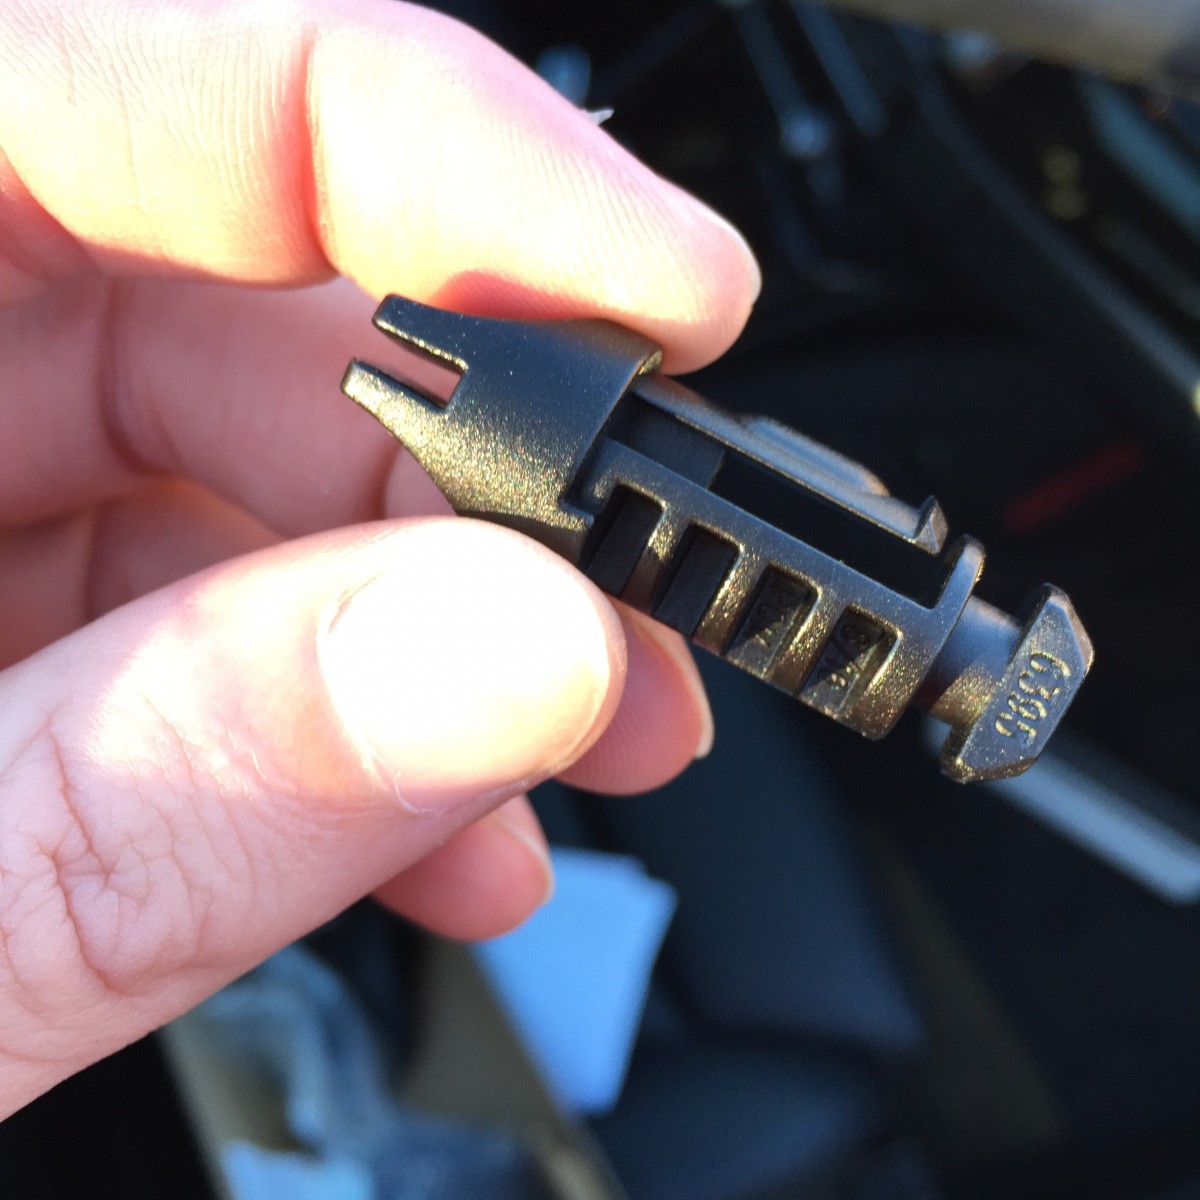
Install the caps
Remember the other half of this? The part I’m holding? Now, you just need to install that.
If the slot is vertical, it’s open. Turn it clockwise to a horizontal position (I used a knife blade because that’s what I had in my tool box, but I suspect a coin would work well too) to latch it. Give it a tug to make sure it’s actually latched.
You are done. Hooray!
Perhaps the experience has left you wishing to learn a little Swedish?
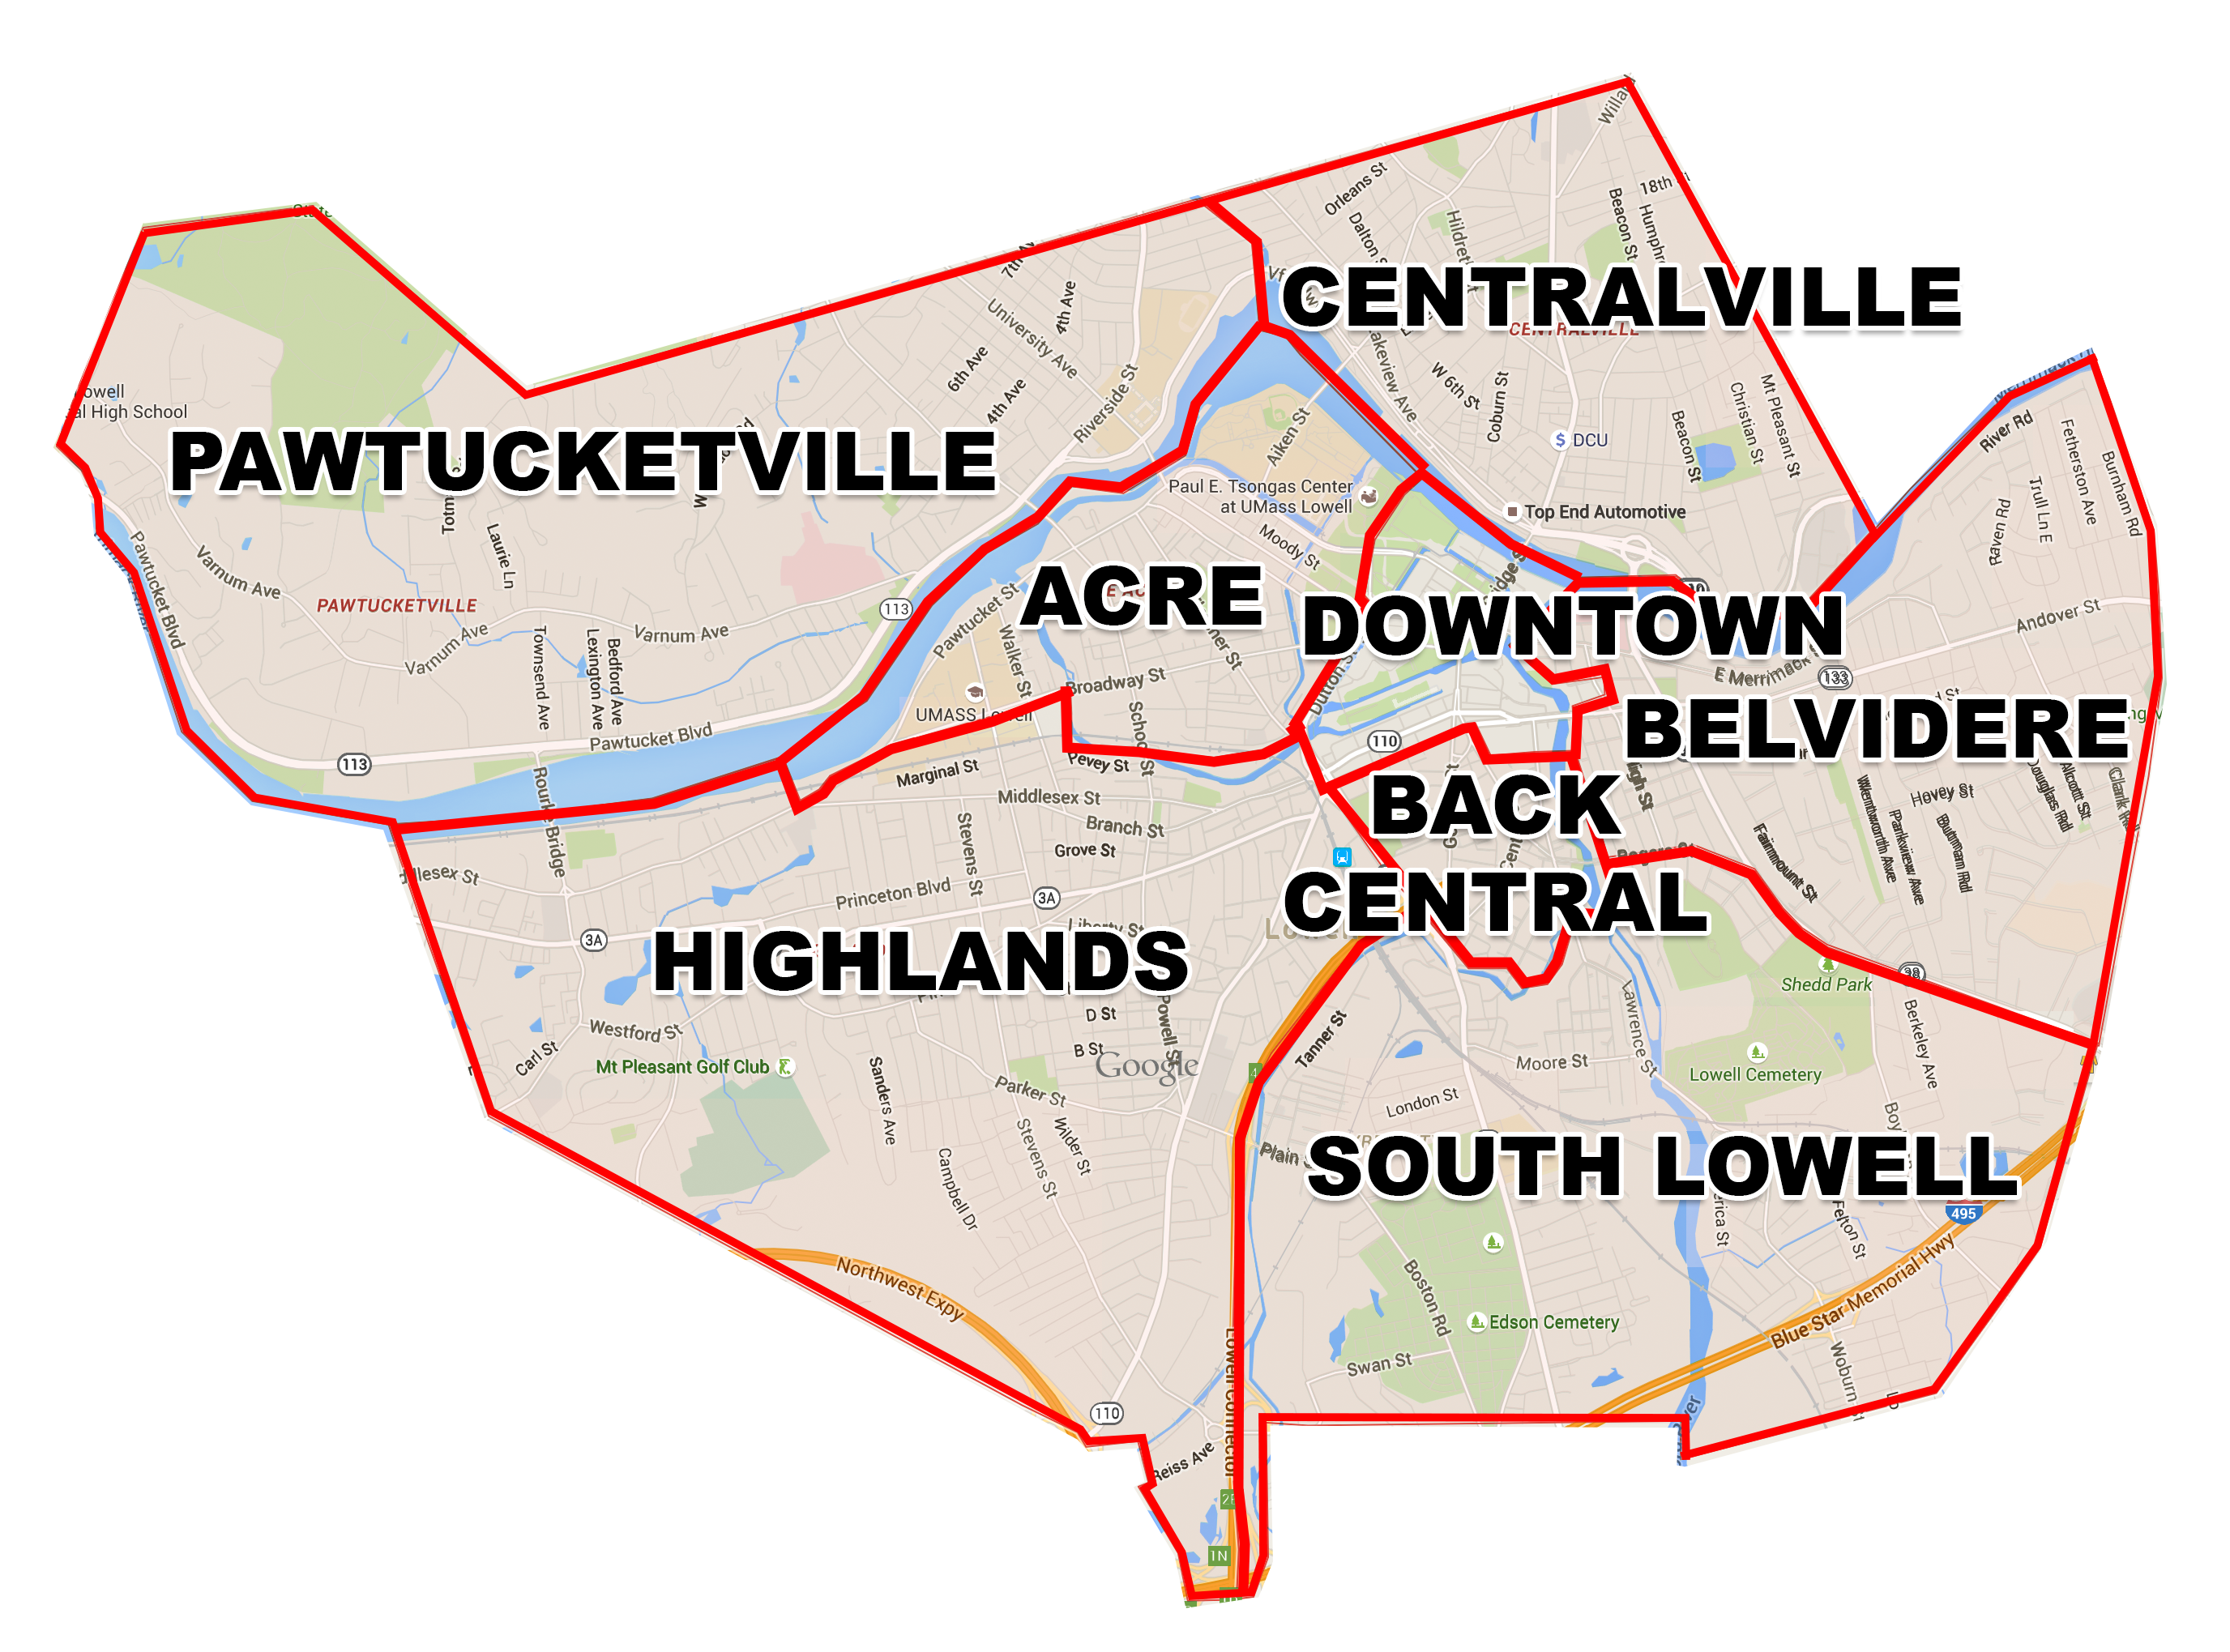
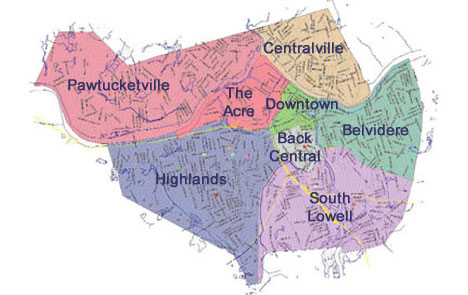
I struggled to find a decent map showing the various neighborhoods of Lowell. The obvious conclusion: I should make my own.
It turns out that Google Maps knows about them, so you can search for, say, The Acre, Lowell, MA and get a map showing the boundaries. Here’s what you get when you combine all of them hastily in Photoshop, draw thicker borders, and add too-large labels:
The old city site has some information which is now hard to find, but it included this small map that turns up a few places… It’s what spurred me to create something else.
There’s also this PDF, whose canonical source is on the testwww.lowellma.gov site which doesn’t sound like it’s meant to stick around, hence me saving a copy.
What’s interesting about that PDF is that it defines some additional neighborhoods—the Highlands also have the easternmost section split off into Lower Highlands, Belvidere has its northwestern portion as Lower Belvidere, and the section of South Lowell that’s west of the Concord River is known as Sacred Heart. Those neighborhoods don’t seem to be widely referenced anymore.
I pretty recently learned the phrase dog-whistle politics. The idea is that certain phrases have hidden, extra meaning to certain people. The Wikipedia page gives state’s rights as an example where political comments often have a more nuanced meaning that’s semi-concealed.
I’m not sure if it’s properly the same concept, but one apparent example of this I’ve become really interested in is the “Black lives matter” and “All lives matter” phrases. “Black lives matter” became a common refrain after Michael Brown’s shooting, and came to encompass a general frustration (probably too tame of a term) at the apparent disregard for how many people of color were shot by police. And, much like the proper definitions of feminism, I think that’s a cause that everyone should support.
But then, “All lives matter” and “Police lives matter” became common counter-arguments. And I saw many tweets along the lines of, “People who don’t attack cops don’t get shot. #policelivesmatter.” It started to be associated with people who argued that Darren Wilson was innocent (or even, in some people’s strange opinions, “a hero”), and that Michael Brown pretty much deserved to be shot. (To be clear, that is not my opinion.)
I remember being very upset upon reading a tweet that said something like, “On 9/11, many police officers knowingly ran INTO the Twin Towers. #policelivesmatter” And I realized that it had reached the point where the actual words used were entirely irrelevant.
The literal meaning, and that a person not familiar with a lot of backstory, was one that everyone would agree with: there were so many heroes in the NYPD that willingly gave their lives on 9/11, and saying that their lives matter is so patently obvious that it seems weird to even mention.
But the reason it seems so weird to mention is that there’s a lot of hidden meaning, or at least that I read into it. It reads like a counter to the “black lives matter” people, in a time with a lot of police brutality being discussed in the news. What I read wasn’t a lot different from, “Black people need to quit complaining about being disproportionately harmed by police violence. I side with the police who choked Eric Gardner.”
The point here isn’t whether I correctly read the meaning, nor who is correct. I’m merely fascinated by how some terms or concepts can become so incredibly charged that people read into them meanings that aren’t contained in the actual words said. Because of the specific phrasing and the timing/context of a comment, I took a tweet expressing gratitude for NYPD officers who gave their lives on 9/11 as an appallingly racist, hateful message. And that is utterly fascinating to me.
But this isn’t isolated. Conversations about the Confederate flag, “religious freedom,” or “women’s rights” often conjure up extremely strong emotions and opinions, even where they’re not necessarily intended. And just try to have a rational conversation about gun control or the Second Amendment, or immigration policy. The terms are so charged with meanings you likely don’t even intend.
I find most weather sites annoying. They either don’t give you enough information, or they give you too much entirely irrelevant information. (And that’s not even counting the prominent “weather” sites that are about as weather-focused as the History Channel is about history.)
Here’s a few sources I’ve taken to looking at:
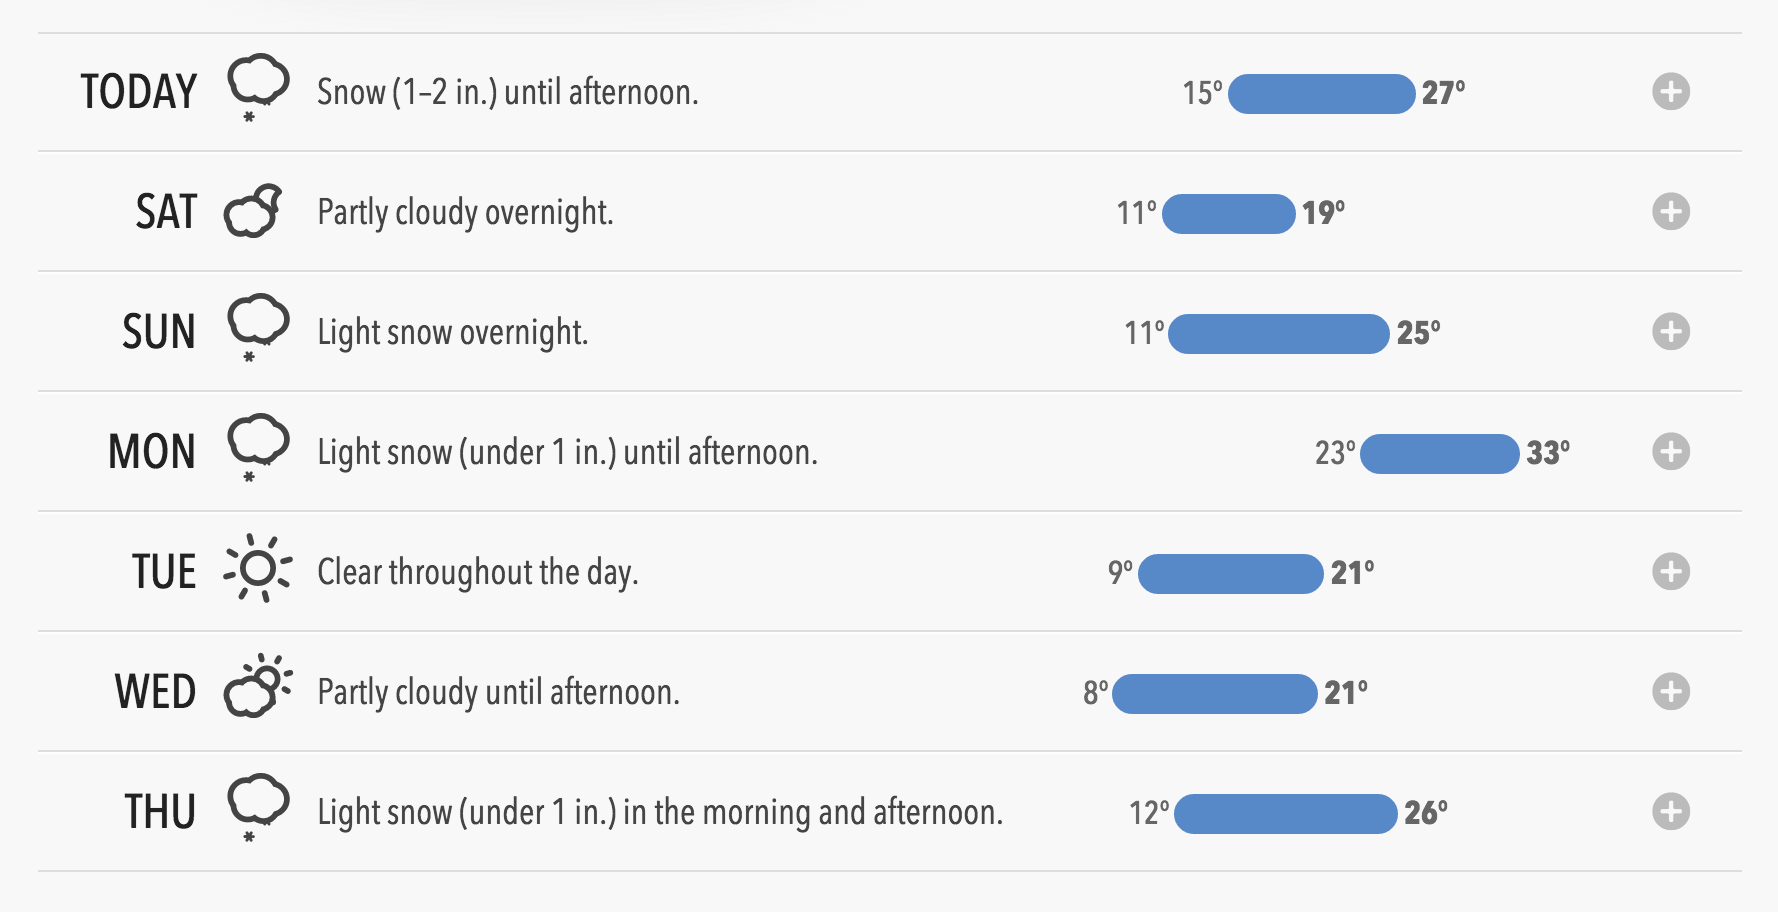
Forecast.io
I just discovered this site yesterday. It’s a weather site that doesn’t look like every other weather site. Here’s just part of their forecast:
And then there’s their Weather Atlas, presenting a (literal!) heatmap of temperatures and precipitation worldwide, in a really neat view. The presentation was so neat that I bought their $3.99 iOS app, Dark Sky.
NetAtmo
I have a NetAtmo weather station at home. I can view the weather outside on my smartphone, whether I’m home or away.
But they also have a weather map with the weather from everyone who’s deployed these. The temperatures do seem a bit variable; I suspect some are installed very close to houses, in the sun, etc.
Weather Wisdom (Boston.com)
Local meteorologist David Epstein has a good blog on boston.com, Weather Wisdom, which is typically updated a few times a week. It’s good for longer-term forecasts, and he strikes a good balance of explaining the variability between forecast models, while neither talking over your head nor making you feel like it’s too dumbed-down.
EMWIN
This is the least user-friendly, by far. EMWIN (Wikipedia overview) is a datastream from the National Weather Service. It includes a whole bunch of their weather ‘products’.
Here’s what they show for KBOX, the Taunton, MA NWS office that covers my area. It’s very non-user-friendly, but I’m not sure that was a design goal. The AFD (Area Forecast Discussion) and AFM (Area Forecast Metric) products are particularly interesting. The AFD is sort of a forecast and a description seemingly meant for meteorologists, and the AFM takes some time to read, but has a lot of information packed into it. There are a lot of other products that are interesting to look at.
It’s the polar opposite of forecast.io—it’s not at all intuitive, but goes very, very deep.
StrikeStar lightning maps
This is far more active in the summer when thunderstorms roll through, but StrikeStar has maps of lightning activity throughout the US, including regional data. It’s powered by people who have deployed Boltek lightning detectors and put them online.
weather.gov
Finally, a reminder that weather.gov exists. It’s not as pretty or easy-to-use as some of the more prominent commercial sites, but they also don’t have “Zoos Worldwide Show Off Adorable New Baby Animals” as a front-page story. They also have an API you can query, though it’s nasty SOAP.
I’ve taken to following a number of news sources on Twitter, many of them being things other than traditional news outlets. It’s a very fast way to get news, and often presents more of a first-hand look than traditional news can provide.
But it’s also important to remember that the news, whether it’s some guy on Twitter or primetime nationwide TV networks, get things wrong from time to time. The Internet makes it really easy for these errors to spread.
Twitter had an outage the other night, mostly affecting mobile users. I saw it reported that there was evidence / experts were saying it was a “hack attack” by North Korea. Nope! Turns out that was groundless speculation, and it was just a Twitter bug.
When AirAsia flight QZ8501 went missing, some of the early reports on Twitter were that it had requested “an unusual flight pattern” change right before it went missing. That’s really suspicious and reminiscent of MH370. Could it have been sabotage? Nope! “[T]he pilot requested permission to turn and climb to a higher altitude because of bad weather,” CNN reports. Many seem to have corroborated that there was a fairly strong storm in the area at the time.
So take your news with a grain of salt. Otherwise you’re one step away from believing stuff like this.
strace is pretty handy on Linux for profiling processes, including attaching to a running one and WTF-ing it.
It turns out that there’s a Mac equivalent, dtrace1. If you skip past the instructions on how to use the terminal and using top, there are some good examples of using dtrace, including a lot more than just profiling system calls.
1 Calling it a Mac app is slightly misleading; it comes from Sun. But to someone used to strace on Linux who is using a Mac, dtrace is the equivalent.
Aquagenic pruritus is a skin condition characterized by the development of severe, intense, prickling-like epidermal itching without observable skin lesions and evoked by contact with water.
It turns out you can be allergic to water. It appears to “only” cause itching, versus causing one to break out in hives, but it’s certainly not something I’d wish to have.