My loving relatives gifted me an Thule AeroBlade roofrack, to celebrate me turning really old and also no longer having a car large enough to shove a Christmas tree in the back of. I figured I’d document the process, for my sanity when I go to repeat this next year, and for anyone else who’s looking at installing these.
Equipment
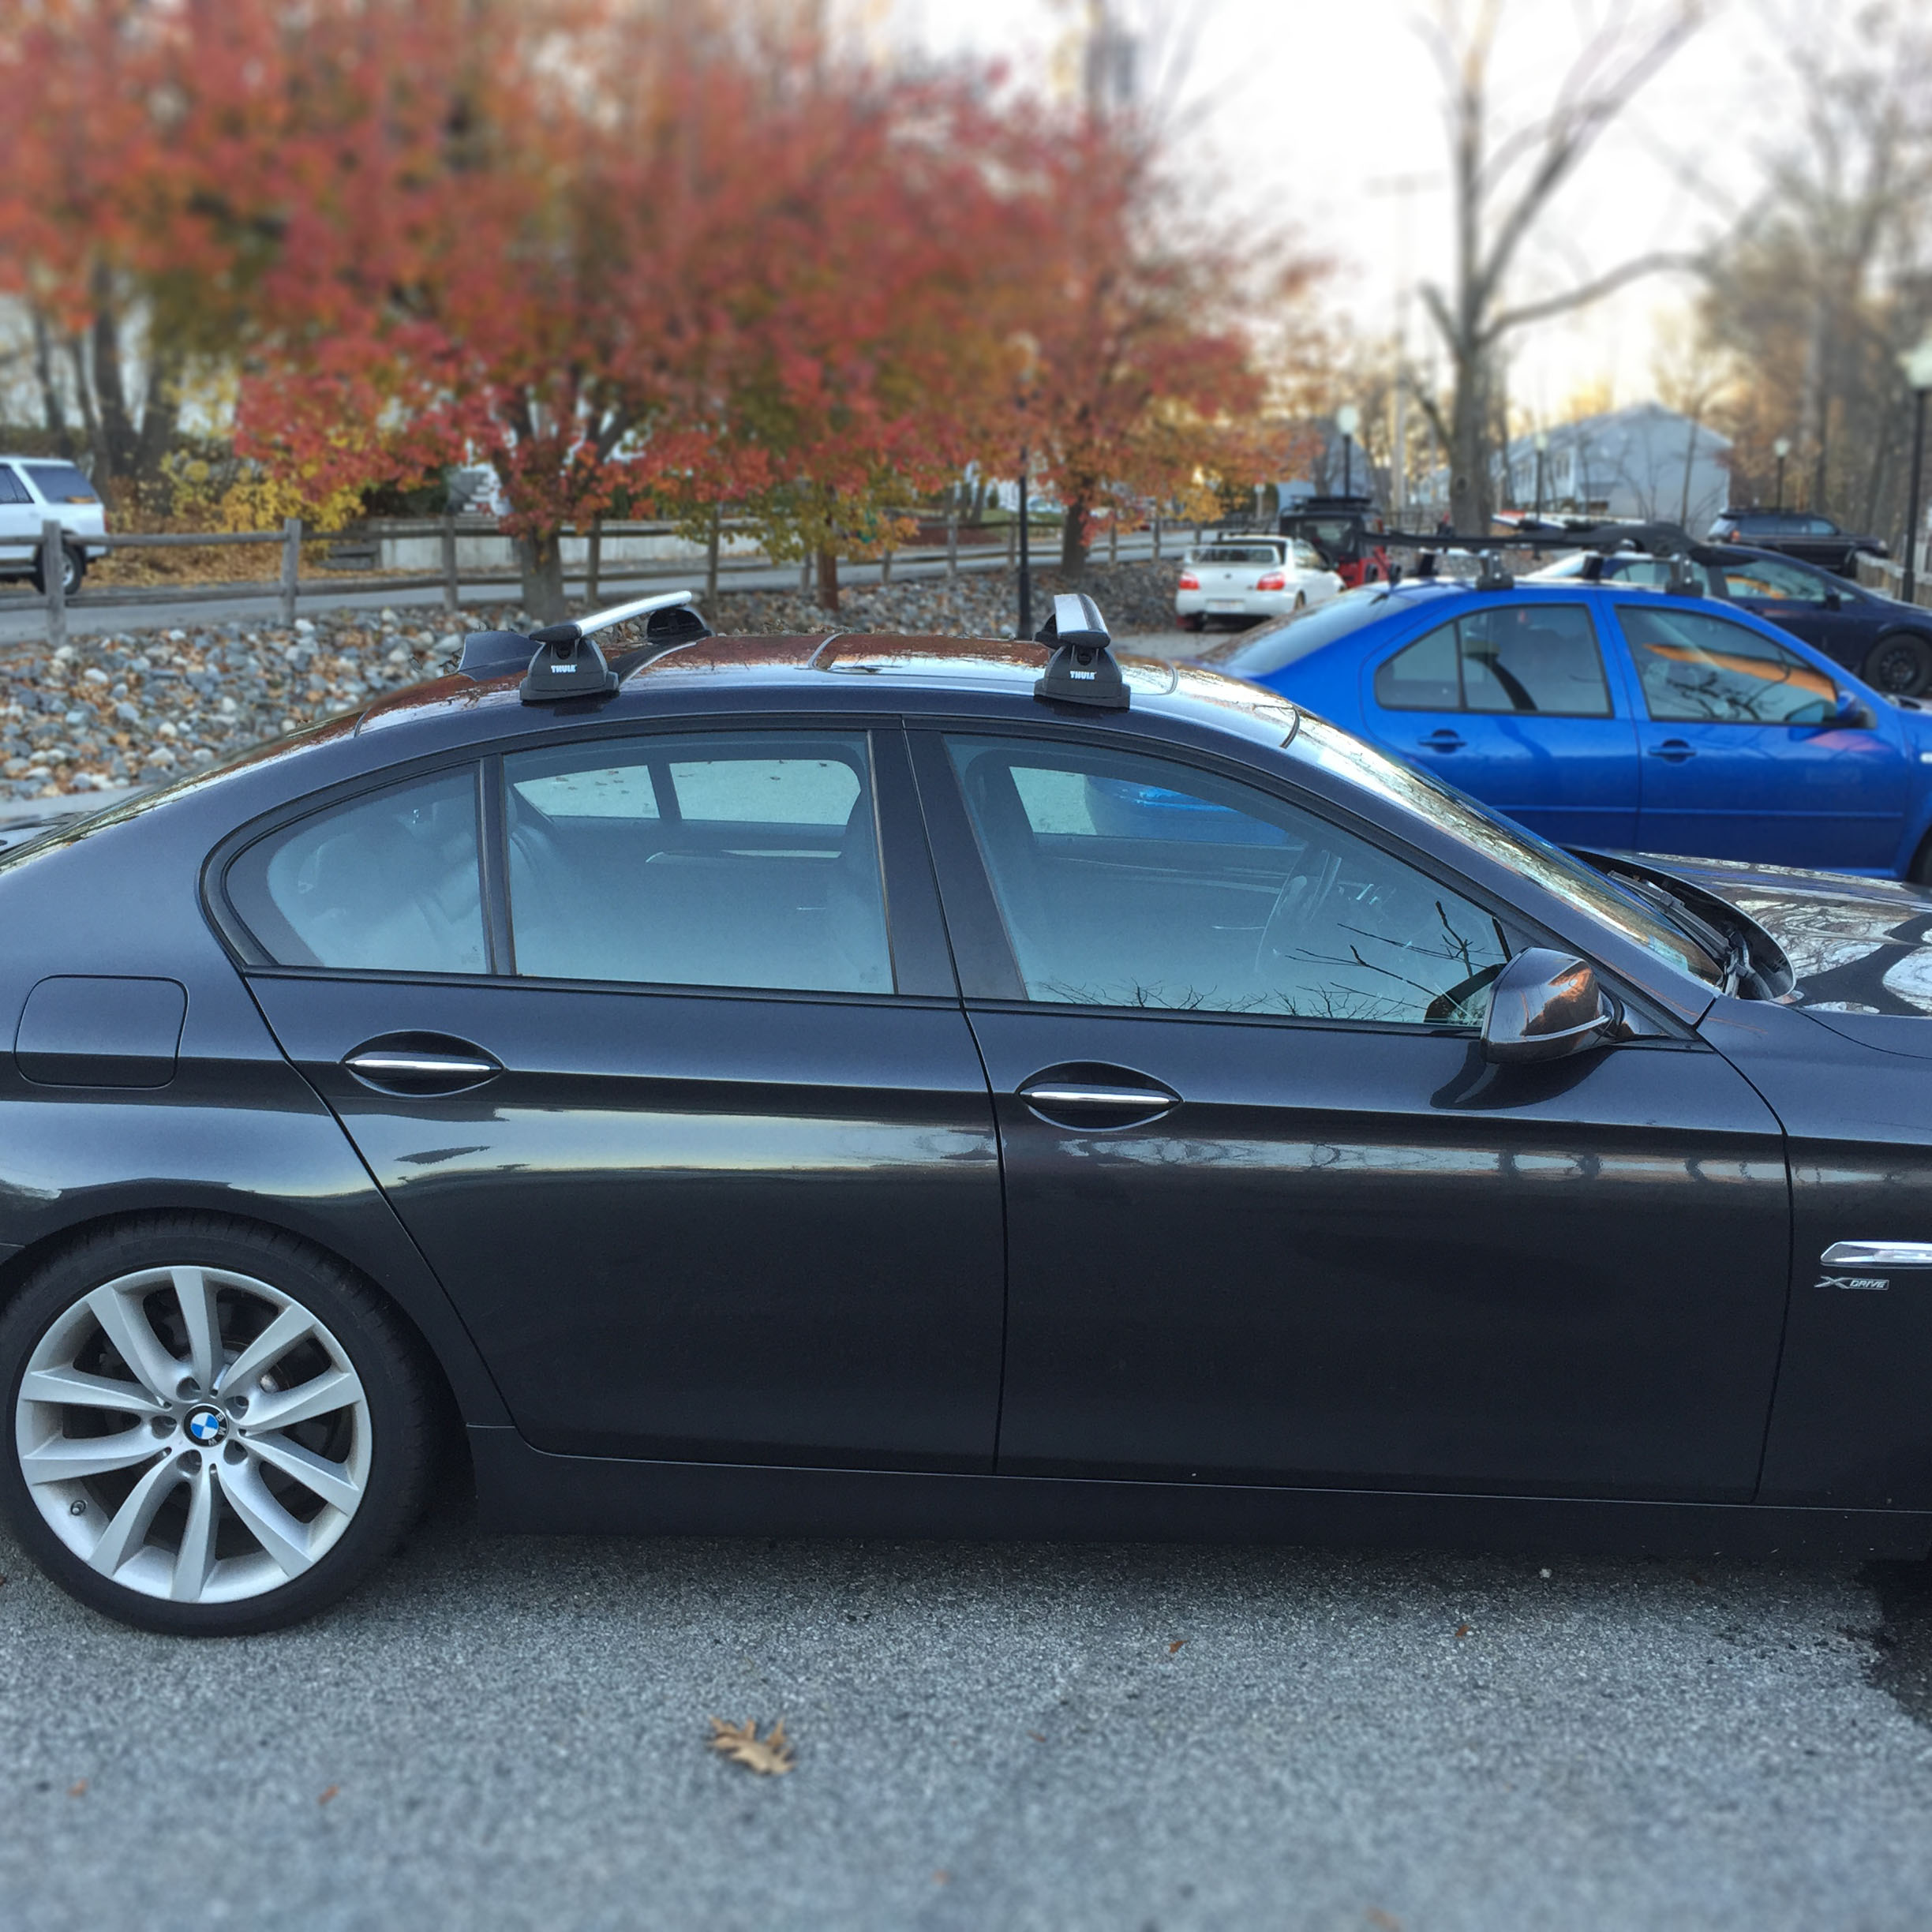
My car’s a 2012 BMW 535i, a member of the “F10” series/class. I believe all of the 2010/2011 and newer 5-series cars will fit into that category. The Thule assembly for this model came in three separate boxes:
- ARB47, Thule AeroBlade, 47″, “load bars” — the actual roof rack bars.
- 460R, Rapid Podium, the base onto which the load bars attach
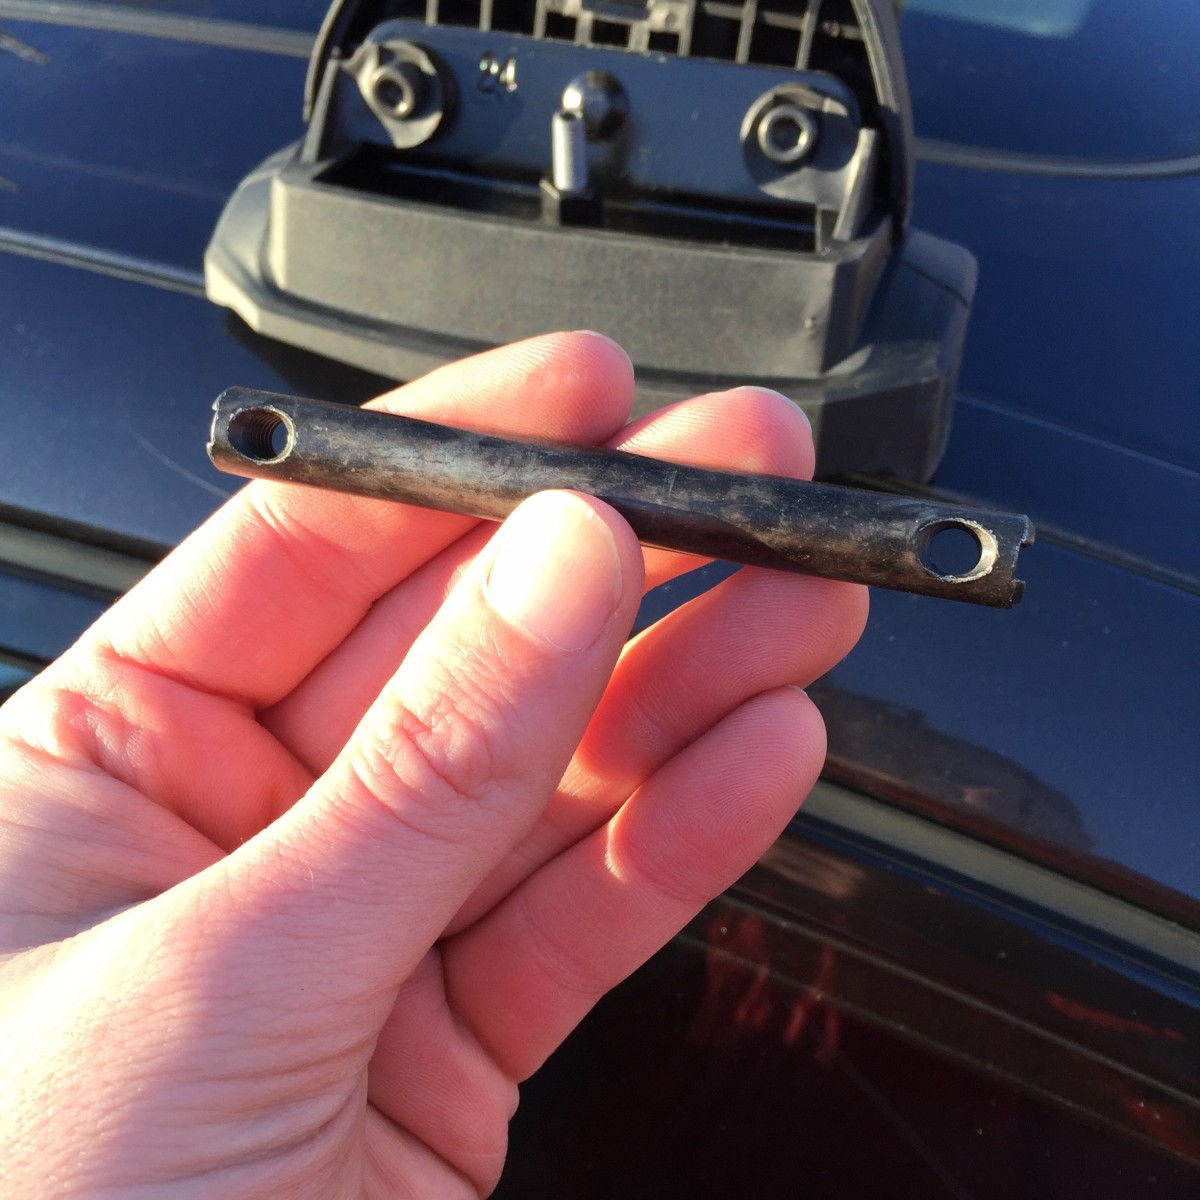
- Kit 3089, the vehicle-specific kit for securing to the roof.
Going wrong
Because I’m a guy, I started by assuming I didn’t need the directions. I mean, how hard can it be? The car even has these flip-up mounting points:
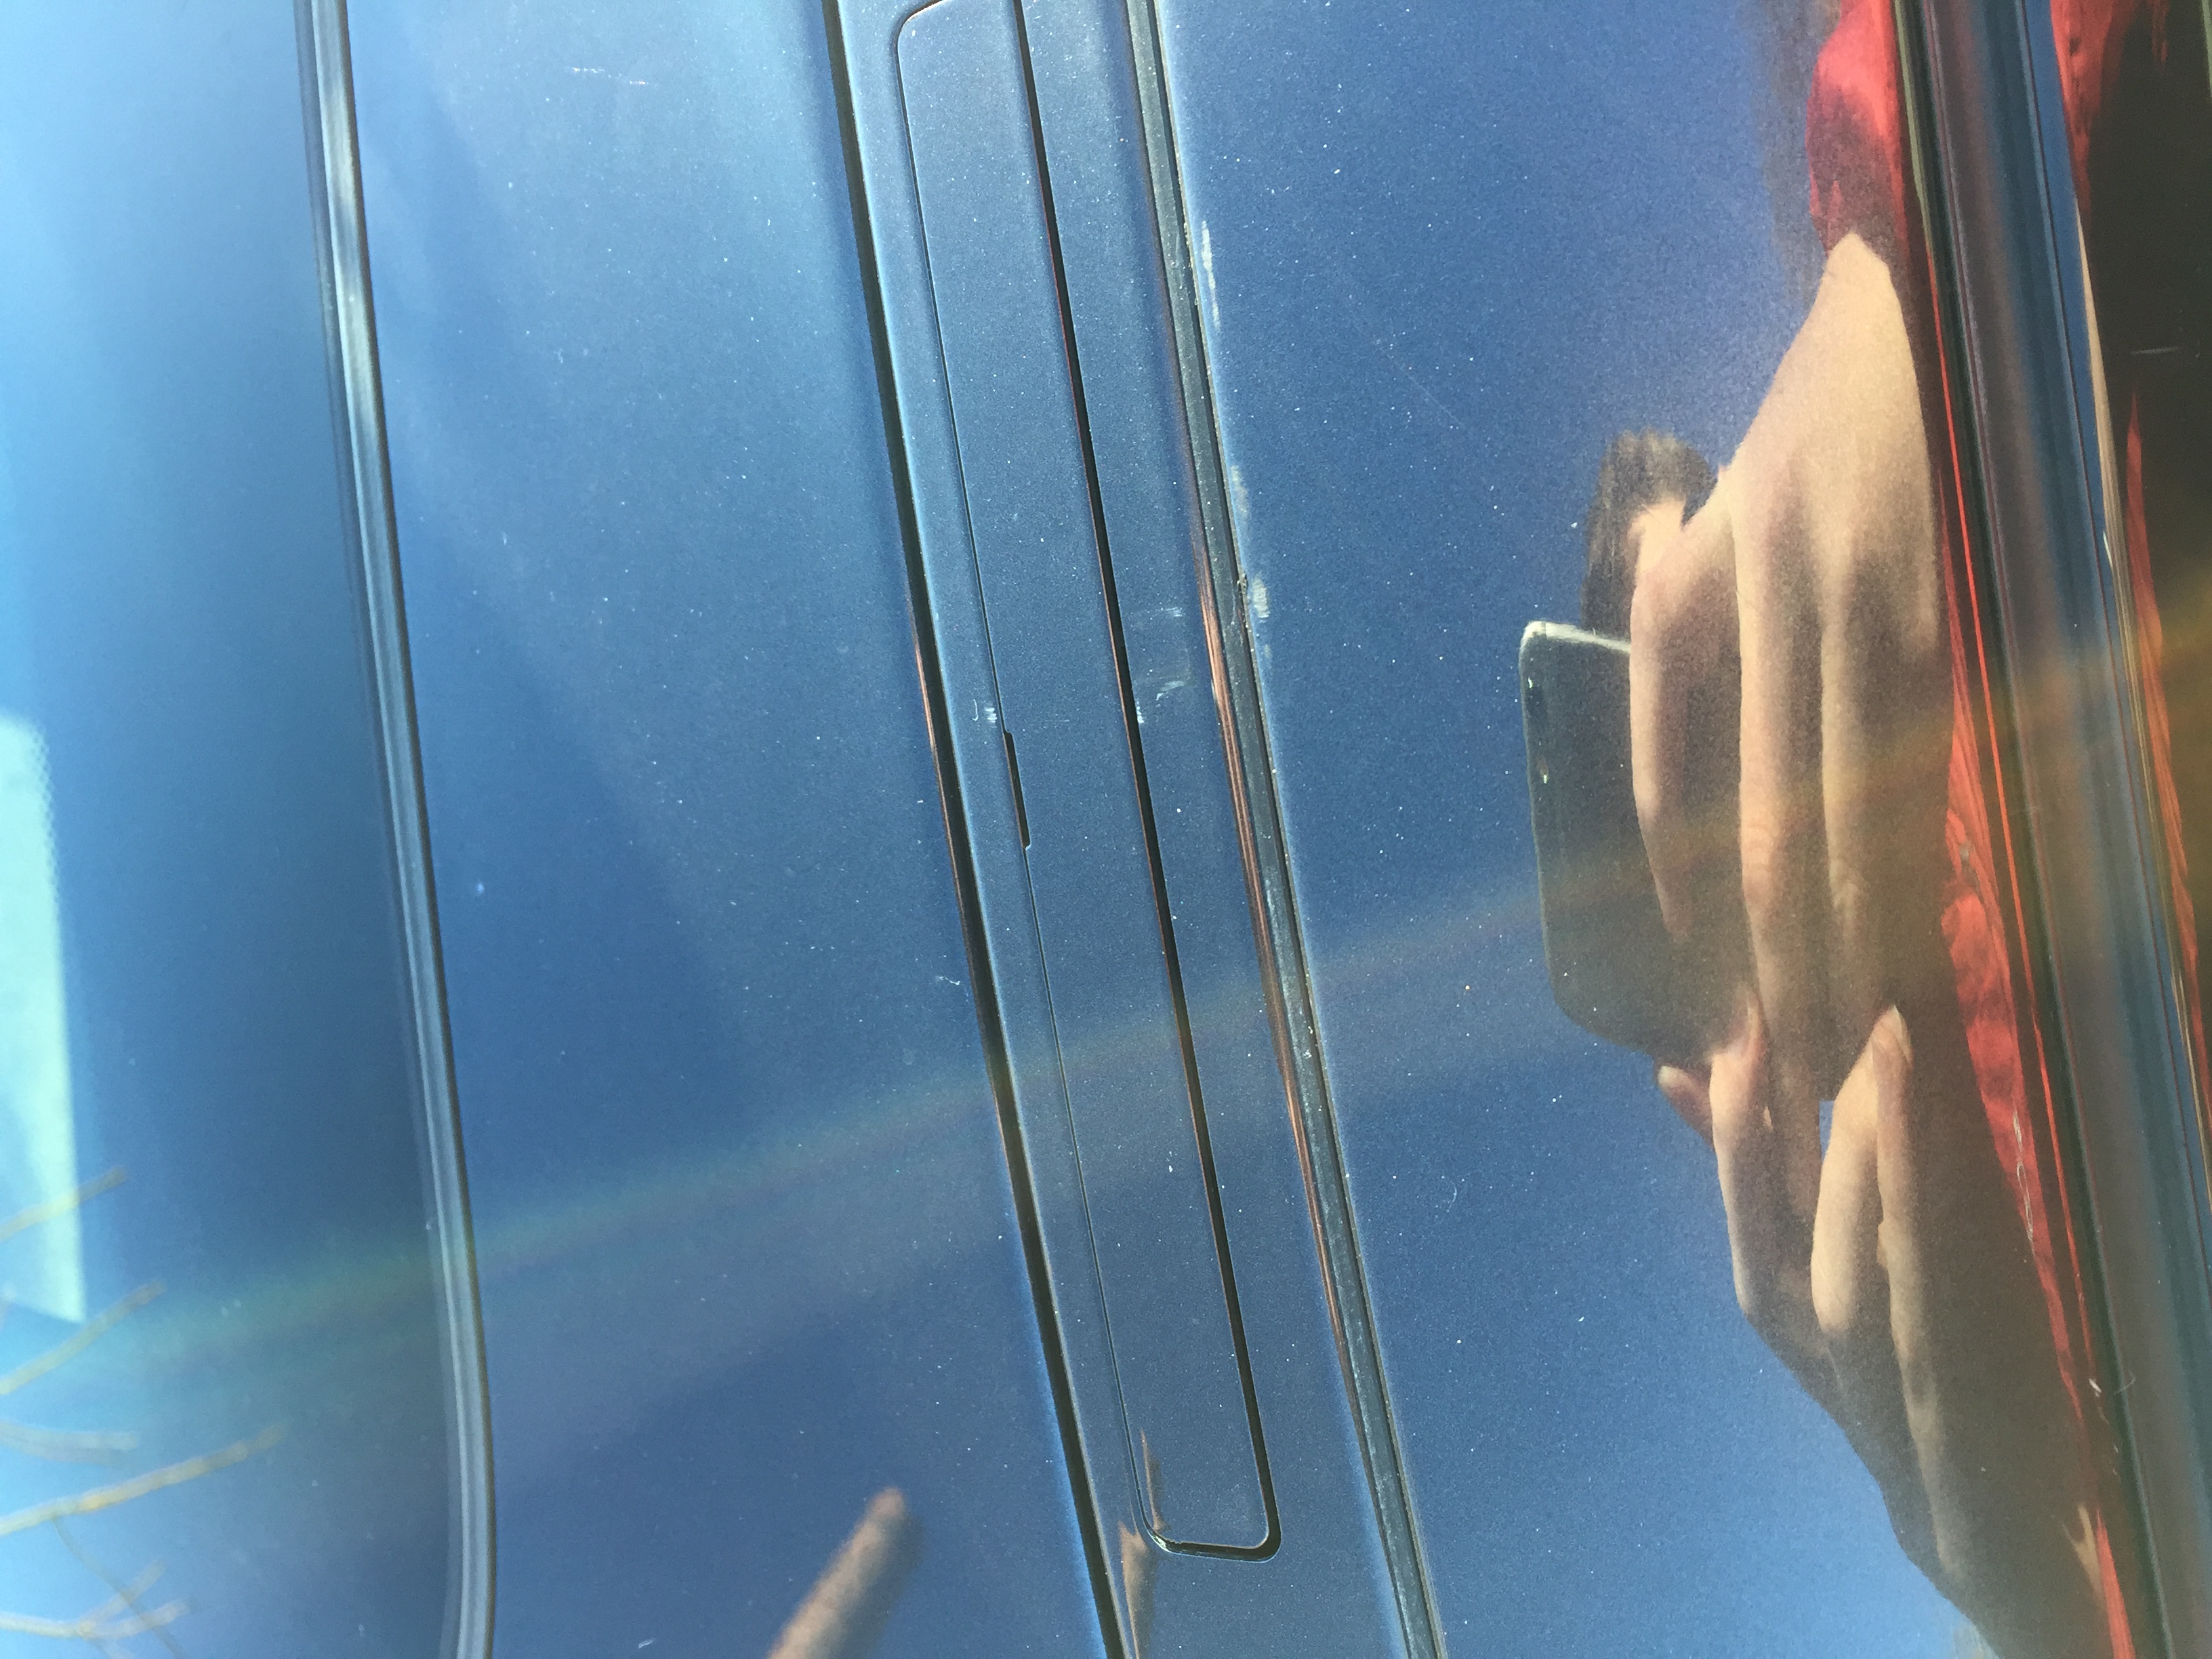
They pop up like so, revealing slots you can screw into.
My plans were quickly foiled when I realized I hadn’t even started with the right box of equipment. Apparently, there’s a reason they include the instructions.
Overall plan of attack
What was totally unclear to me when I was figuring all of this out is that you really can’t just do one box at a time. You can mostly install the vehicle-specific kit first, but then you start needing to meld the other kits together.
The rest of the post will go into much more detail, but you’re going to want to accomplish the following.
First, you’ll install the vehicle-specific mounting kit, “Kit 3089” in this case. This will leave you posts the rest attaches to:
Then, you’re going to want to assemble the AeroBlades, and loosely secure them to the “Rapid Podium”:
Finally, you’ll attach that whole mix to the mounting kit you bolted to the car in the first step.
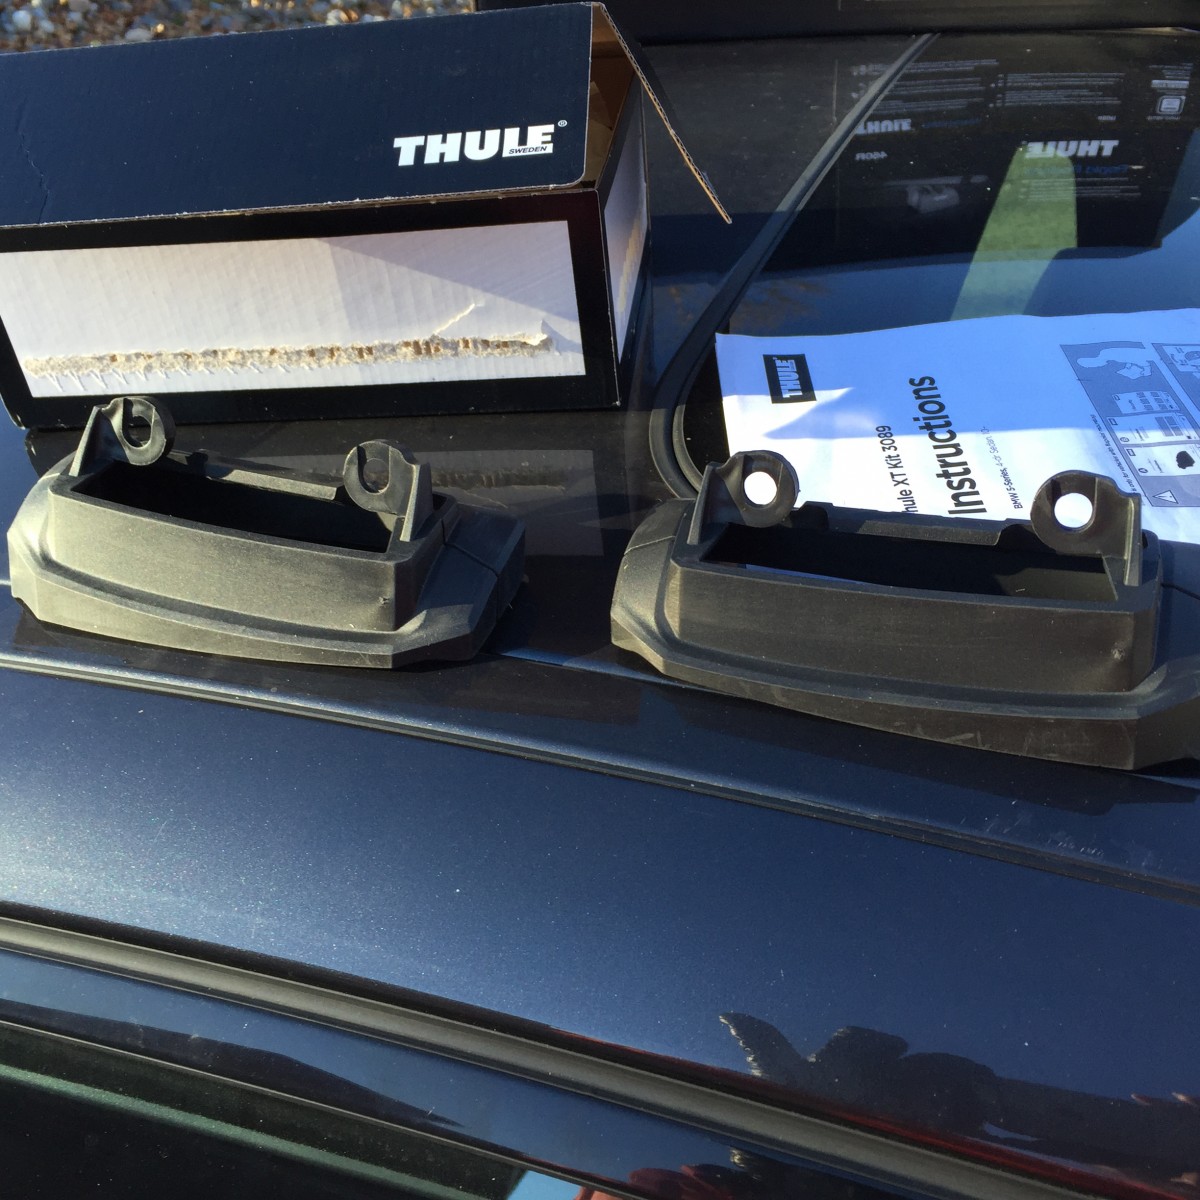
Car Mounting Kit
Have you ever assembled something from Ikea? You know how the illustrations give you a vague sense of what you want to accomplish, but don’t quite tell you how to get there? That’s how I felt the whole time I was doing this, and then I realized that Thule and Ikea are both Swedish companies. Having a little Swedish ancestry was insufficient to intuit what they meant some of the time.
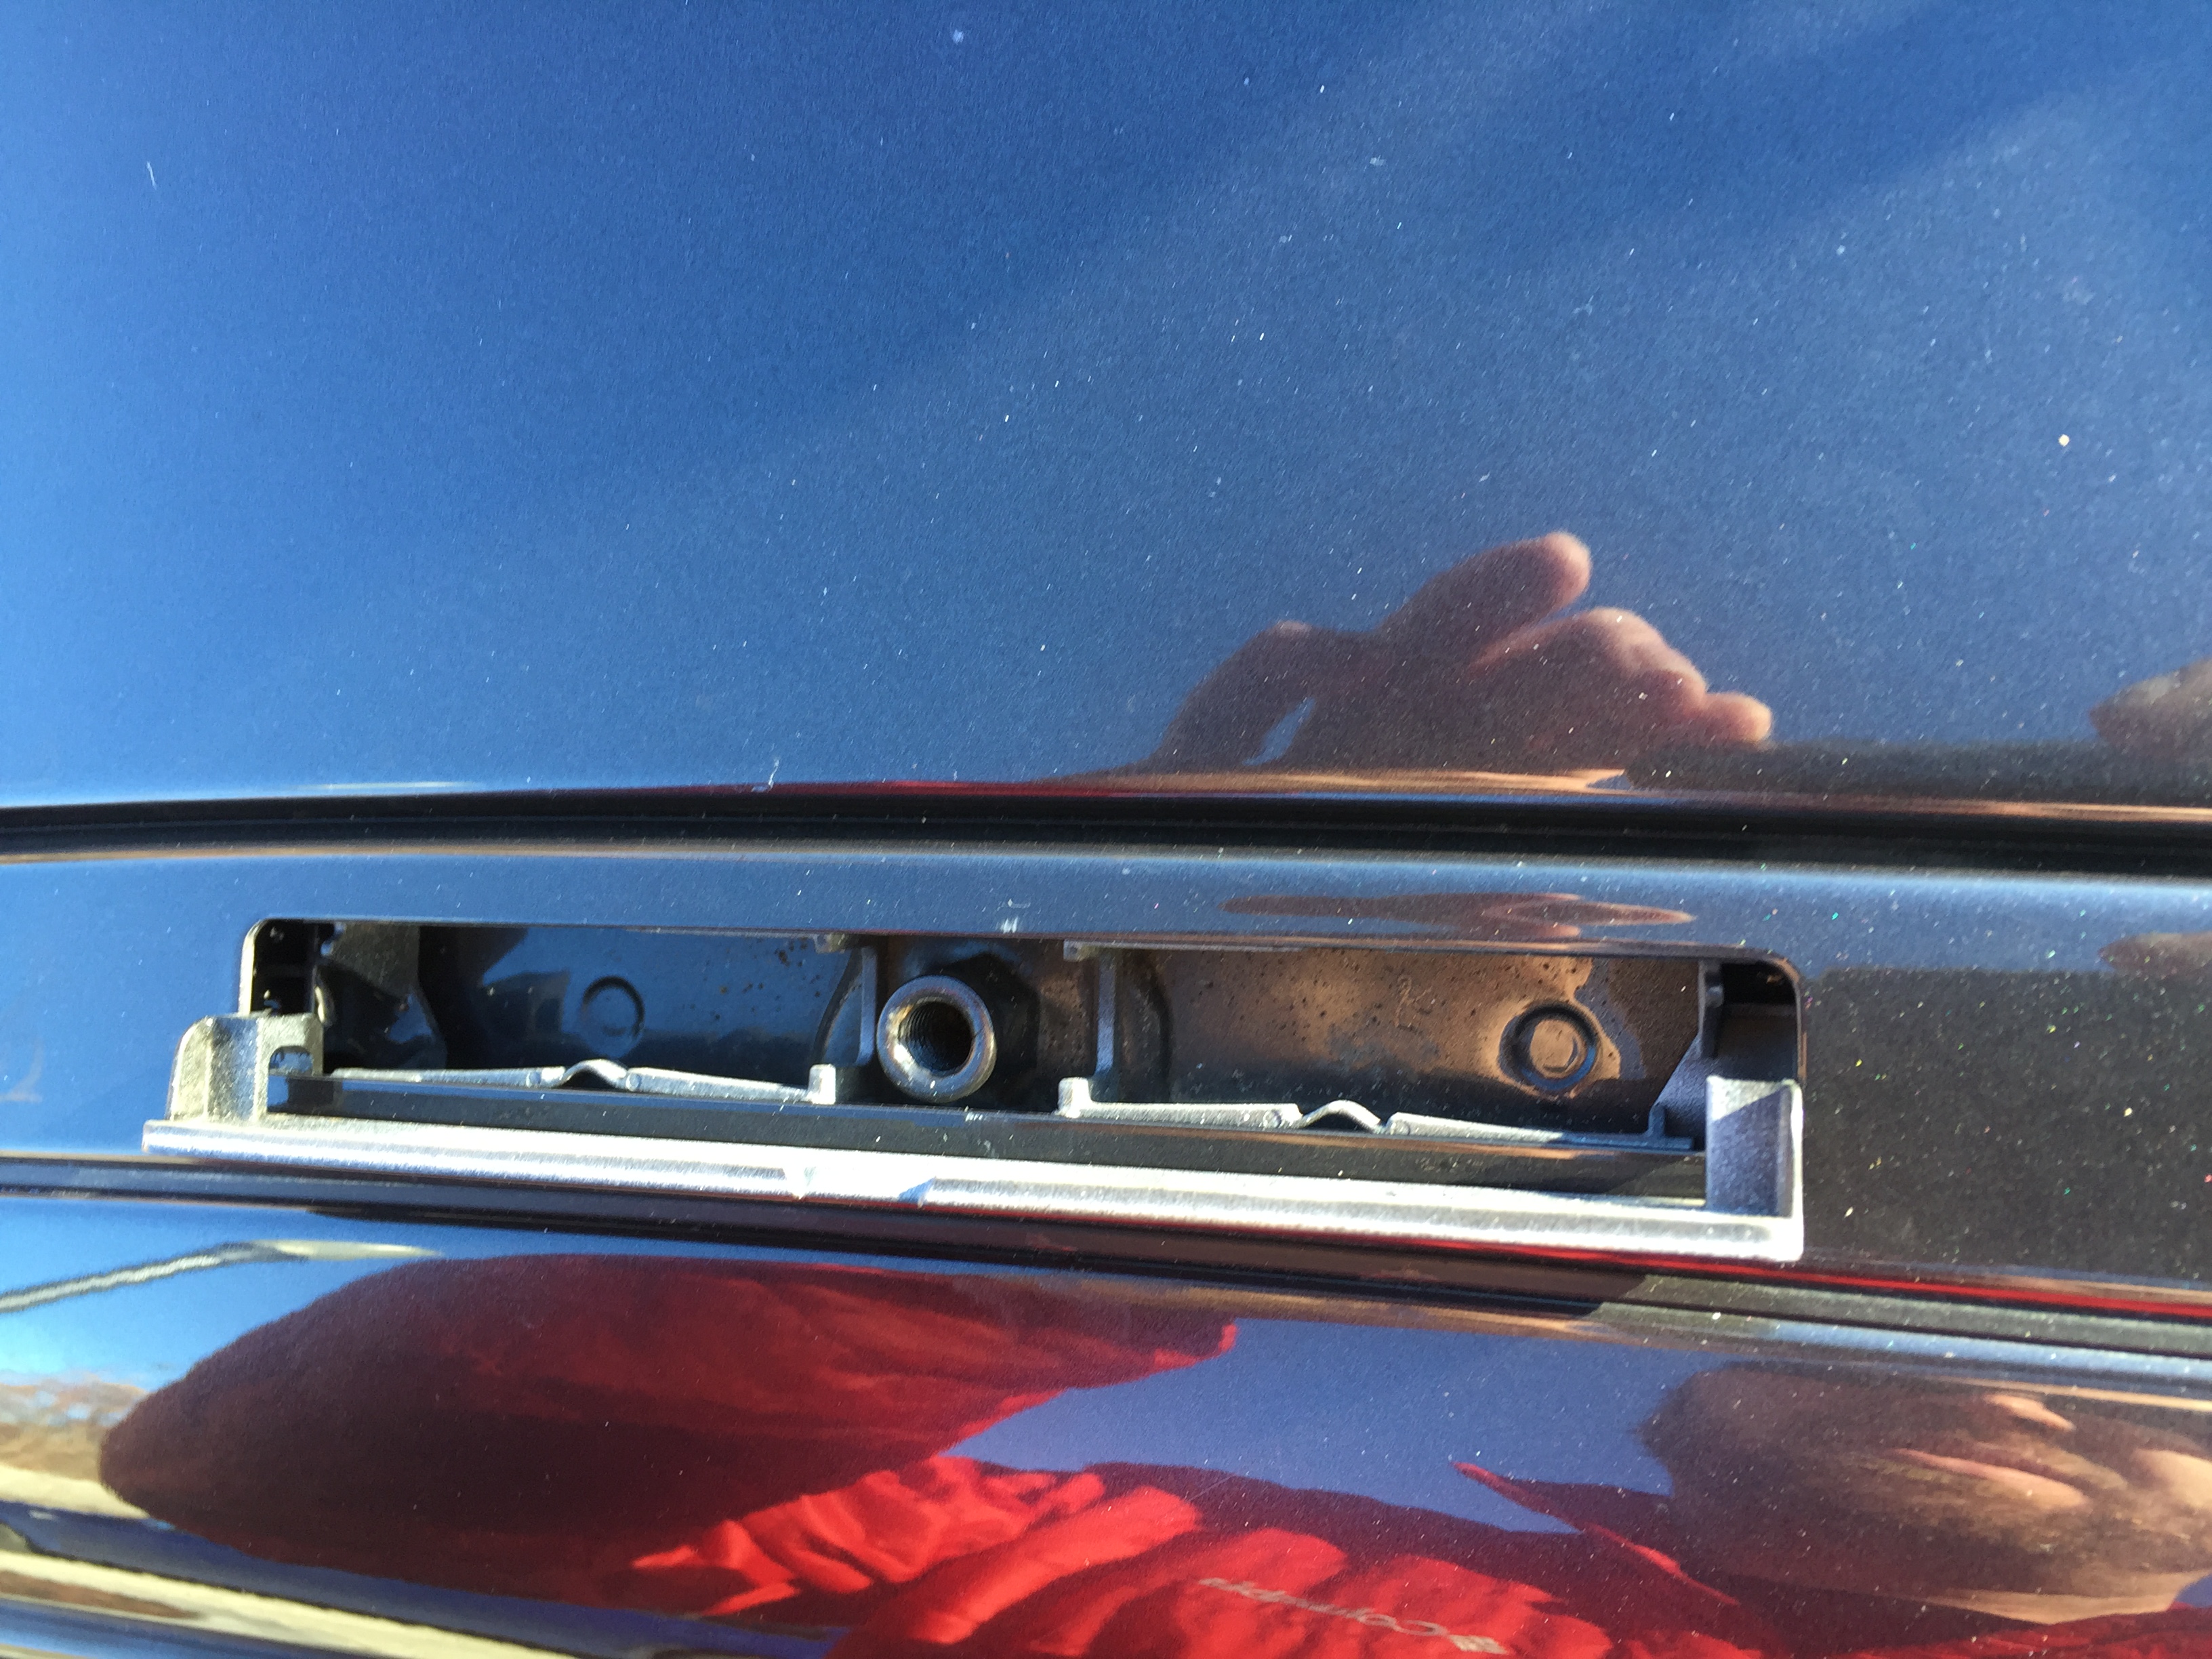
First, screw these bolts into each of the four mounting points on the roof. The mounting point covers on the BMW swivel up to reveal the sockets, but don’t come off. That’s fine; you don’t need them to. One end of the bolt is wider in a small section; that’s the bit that goes into the roof screw-holes.
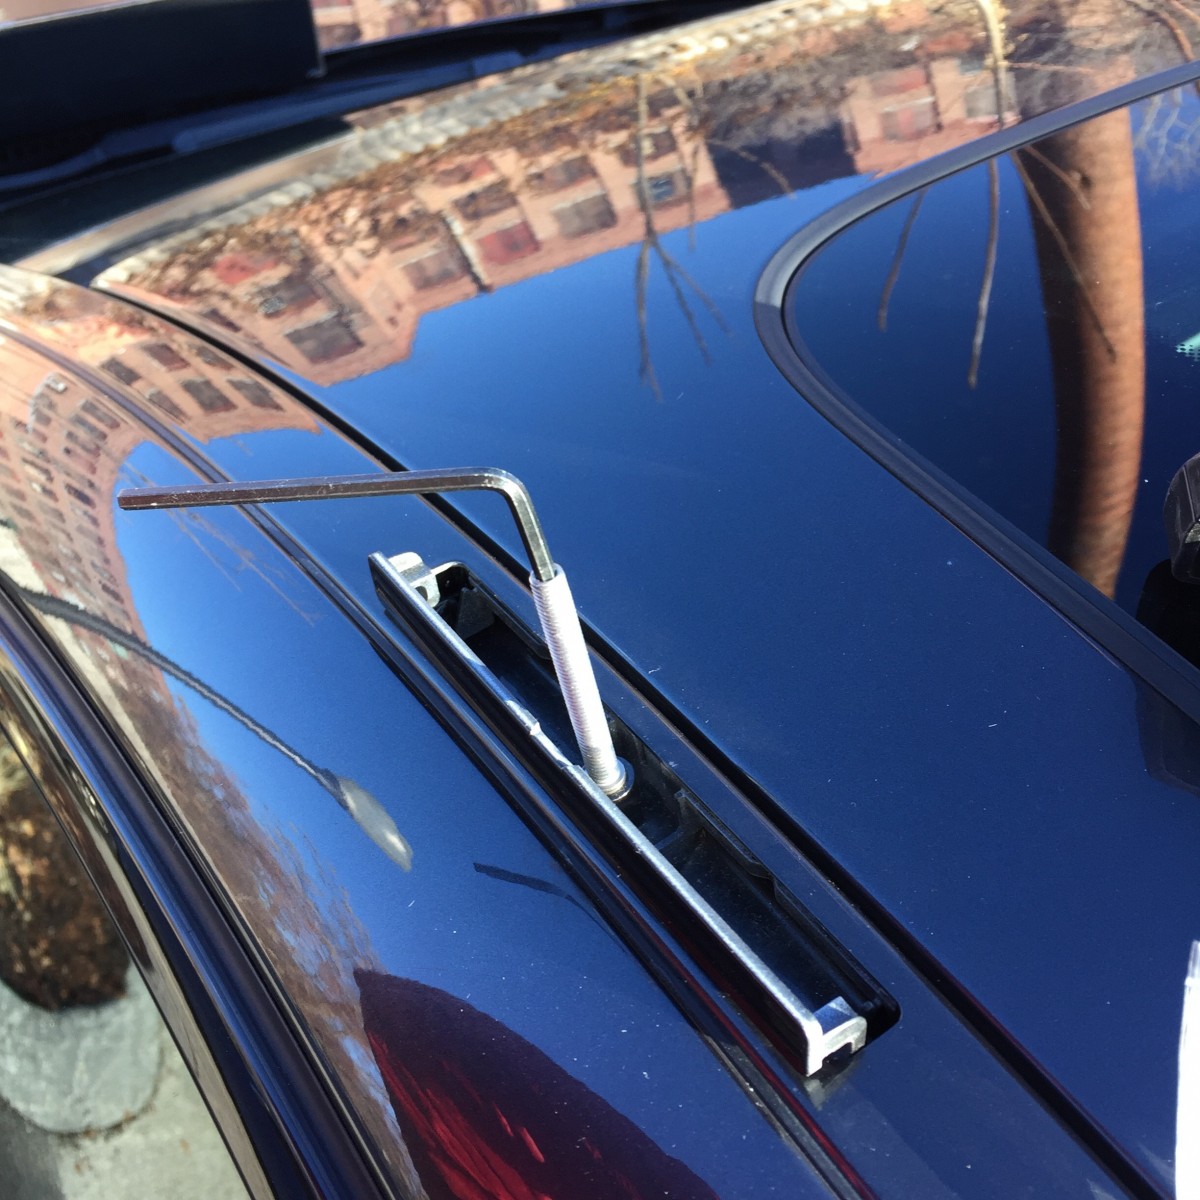
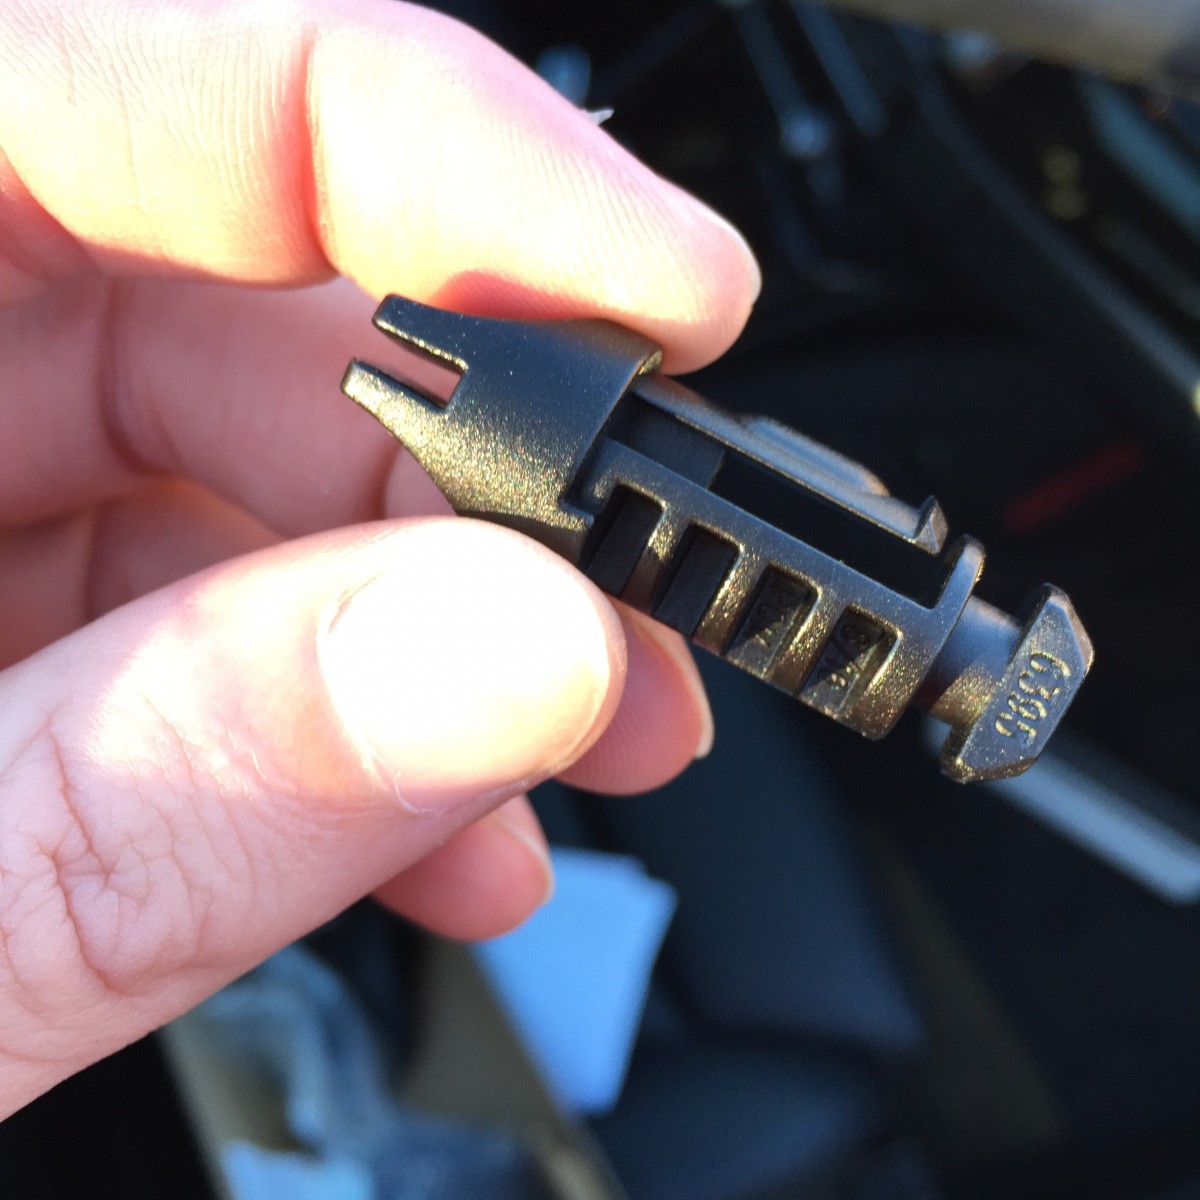
If the bolts aren’t going in, that’s fine. They include a die that you can use to perfect the threads:

You screw that in with a larger 5mm hex bit, and then unscrew it, leaving pristine threads. I didn’t see a 5mm bit in the box, but there was one in the Rapid Podium box. That die is only to fix the threads; it doesn’t stay in the car.
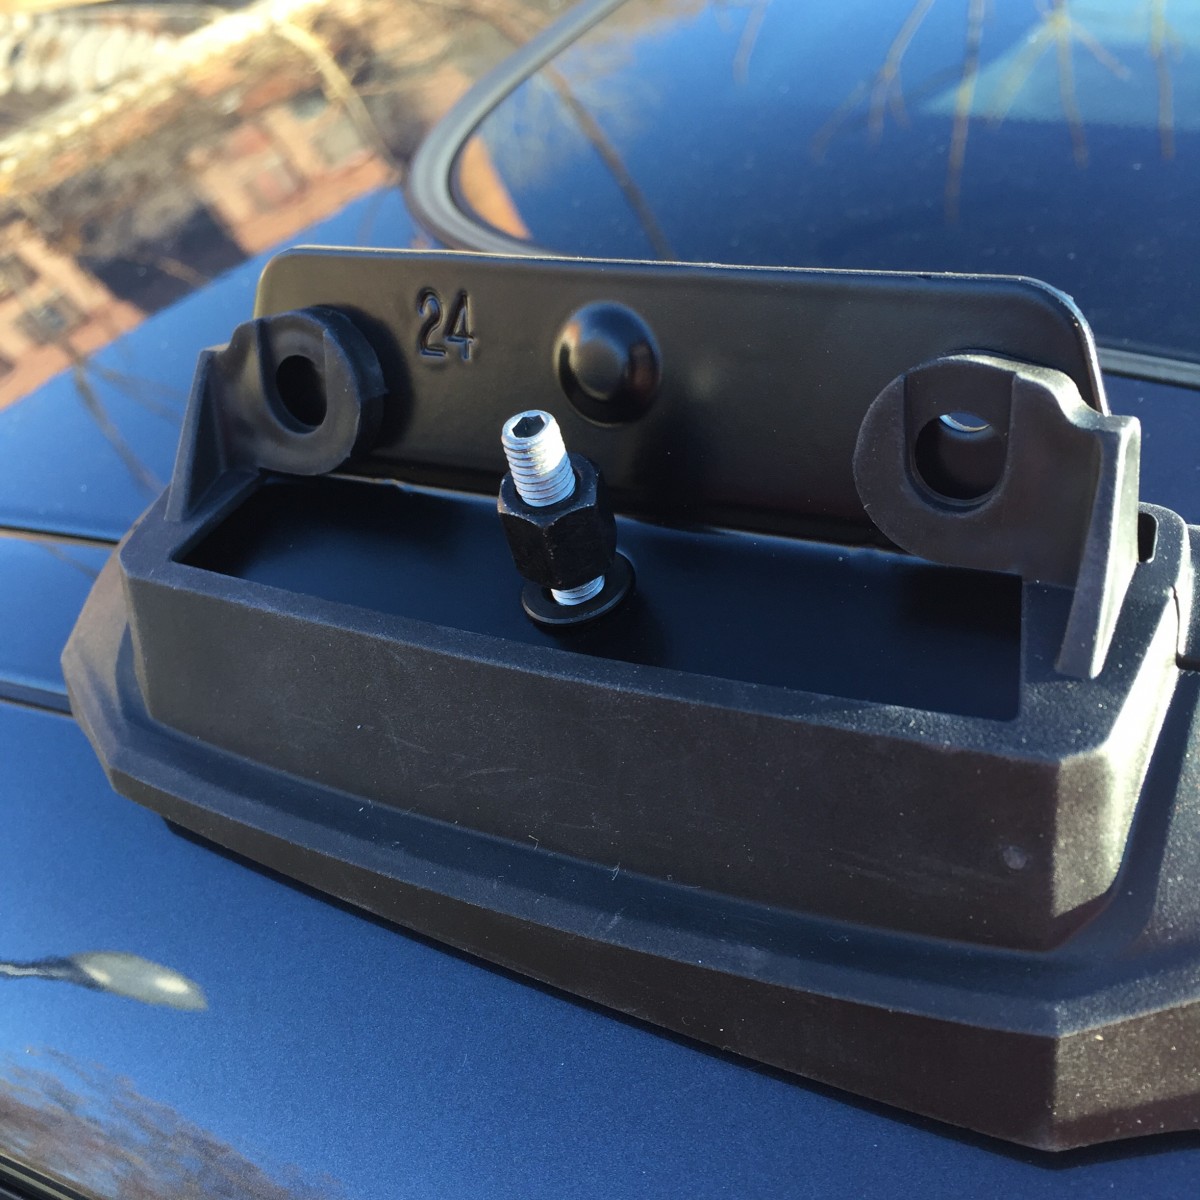
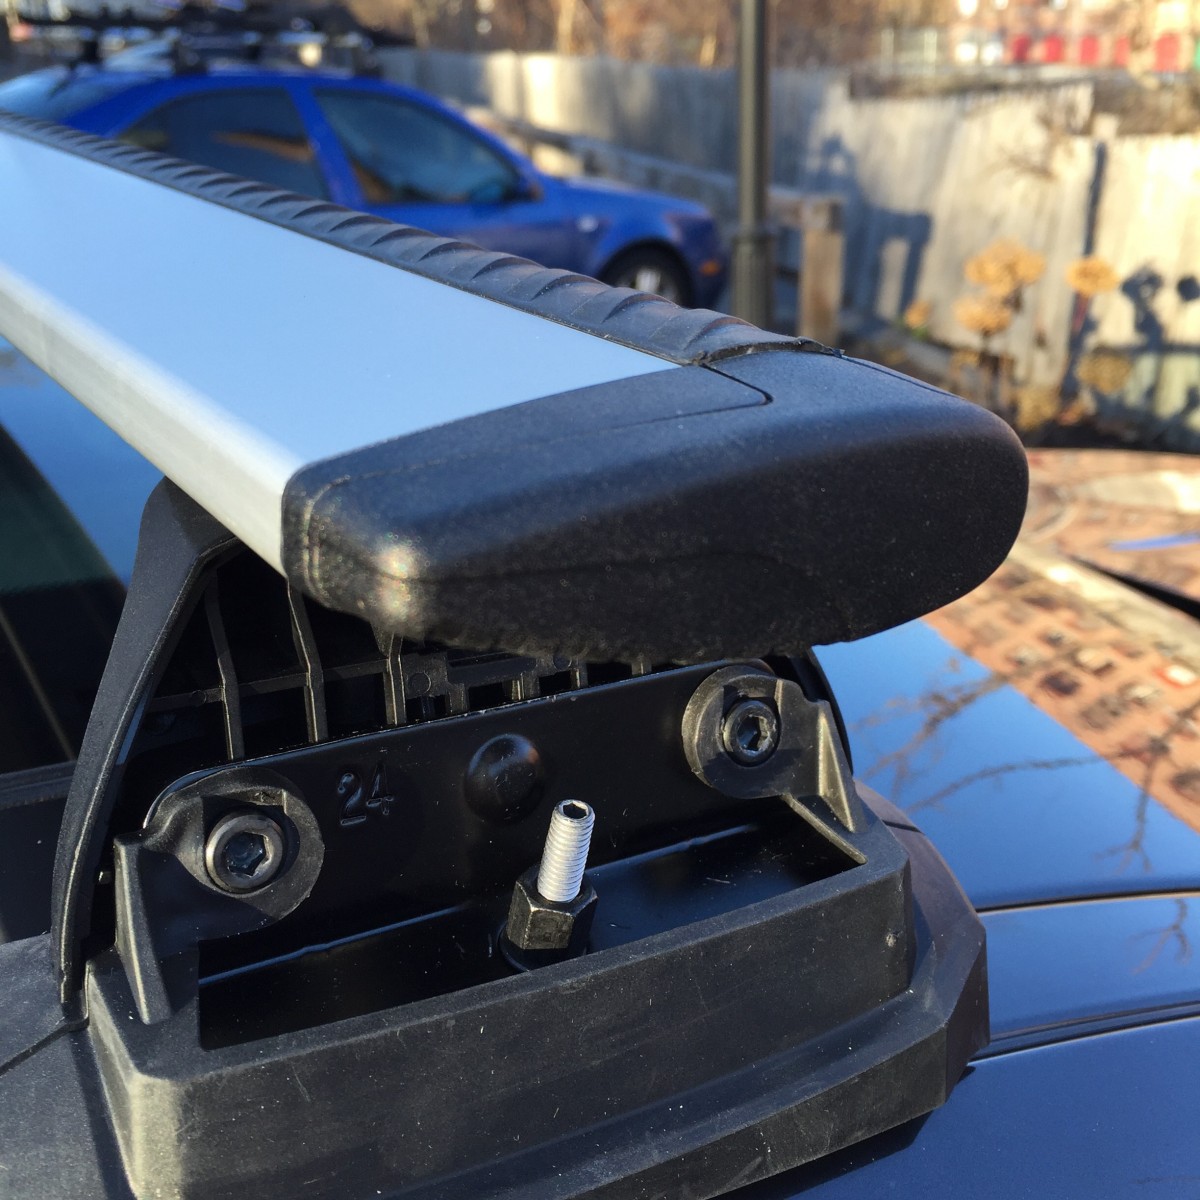
Once those bolts are in, make four of these:

The metal bracket snaps into the larger piece.
Place them on the bolt, with the “24” facing you, so that the back angles away from you. Secure it with a washer and nut from the package. Also, place the rubber boot over it, like so:
The rubber should sit between you and the metal post.
Note that the rubber pieces have separate shapes for front and back. One will obviously fit and the other won’t.
Note that this whole assembly is going to look ridiculously crooked. That’s normal; the other pieces are angled to make it all work. I never got the rubber boots to sit quite flush.
Partly assemble the load bars
All you should do at this point is put the long rubber strip in the top. Note that it has little feet that snap into the channel. Don’t attempt to thread the whole thing inside. (If that last sentence means nothing to you, that’s good; it means your mind didn’t even conceive the bad idea I had for how it was supposed to go together.)

Do not put the end caps in the box on yet; they’d just be in the way for the next step.
Attach the Rapid Podium mounts to the load bars
When you take these out of the box, there are two parts held together with tape. Remove the tape, and separate them.
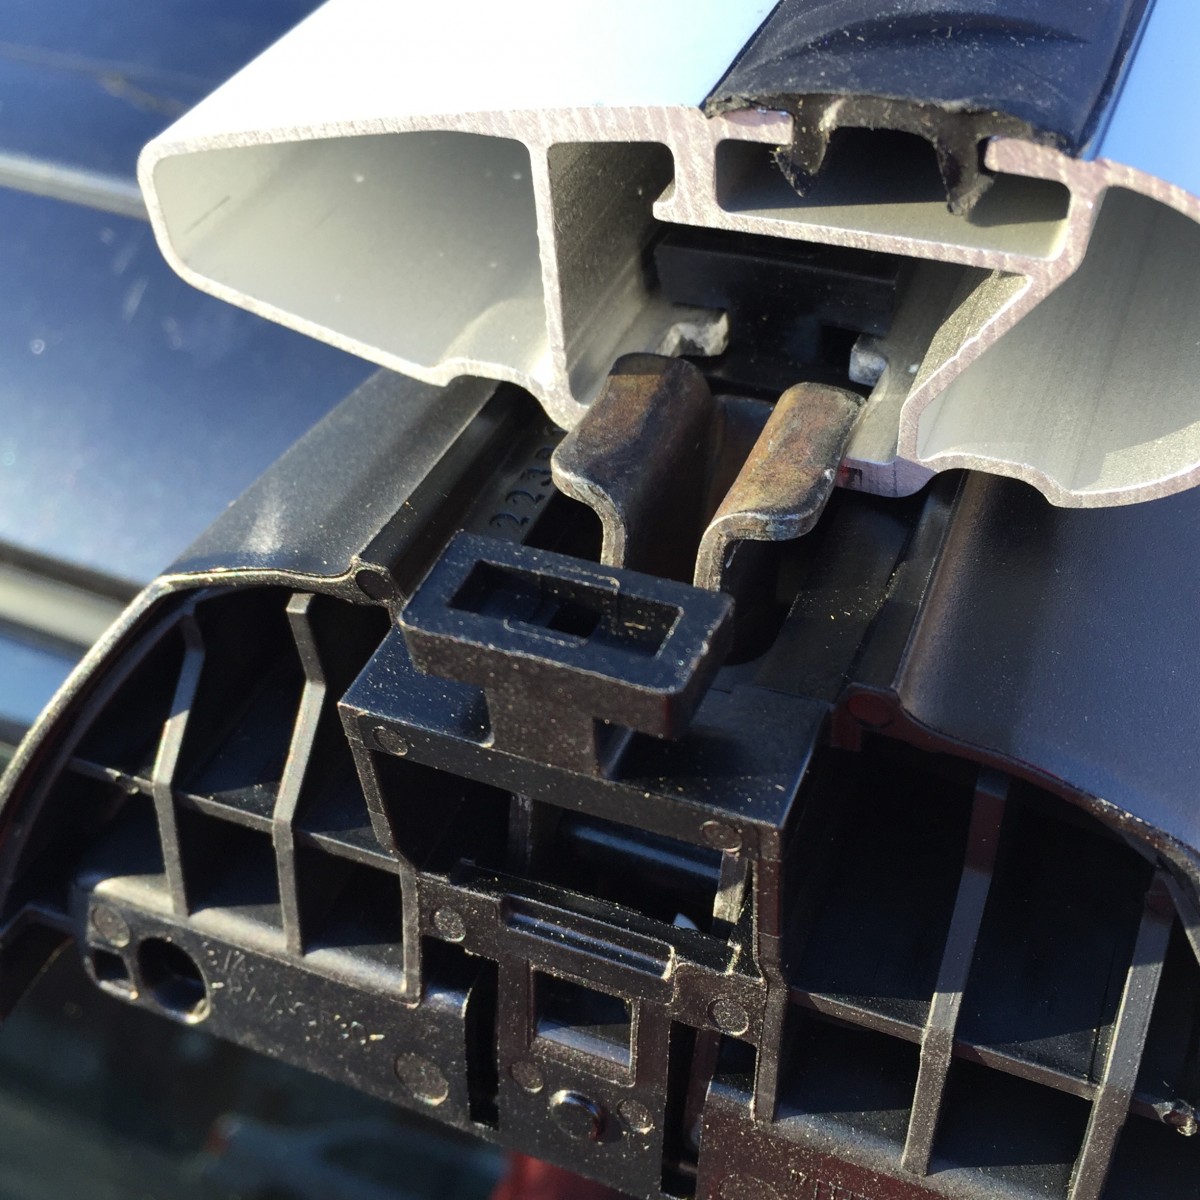
You want the part I’m not holding in the picture. The base will slide into the load bar like so:
The underside of the load bars has an adjustable piece to set how far in the mount goes. I only needed to push it in 2-3″ on each side to get it to fit. The goal is to put the podium mount on each side, and get them loosely matched to fit the bases you installed previously. You’ll quickly find that the podium mounts don’t always want to move. There’s a locking mechanism. Looking at the underside of the bar, it’s this thing:

Pull that inward (towards the center of the bar) to allow it to move; push it out to lock it in place. The nice thing is that it keeps things from falling apart as you maneuver it.
Your goal right now is not to get it mounted, only to size it appropriately. It takes a bit of fiddling, especially trying to make it proportional. Mine ended up a little off-kilter. It bothers me a lot, but not enough to take it off and do it again.
Note that the Rapid Podium pieces only come to the inside of the vehicle mount; they don’t sit on top of it. Like this:
Don’t put the bolts through yet, however. All you’re doing right now is a dry fit to get the mounts set at the right points.
Mounting the bars
You should basically be at the above step, minus the bolts. So now, go to install those bolts.
This is by far the most frustrating step. It took 70% of my time and caused 90% of my irritation. If you can’t get the bolts to thread through, I found it easiest to just cast the whole bar/podium aside and put the bolts in first:

Then try to mount it. I still had trouble on a couple of them, which led to yet another strategy. I removed the metal bar from the inside entirely:
Then I ran the pushed through from the car mount to the podium, and then worked on sliding the metal bar back in and getting the screws to thread.
Unless you’re some sort of natural maskiningenjör, this process is going to take a while before everything begins to thread together. Once you get one of the two bolts to start to go, don’t turn it much! Immediately get the other one to thread in. Otherwise you’ll just never get it.
I found, from experience, that if I didn’t get it after a few attempts, it made the most sense to take apart and start over. Sometimes it took several tries, but aimlessly jiggling and shoving things didn’t help anything at all. Try to remain välbalanserad for this.
Also, keep count of how many times you drop a screw on the ground. A true Swede will number fewer than 20; I did not. And I dropped the wrench even more.
Oh, and watch out for this—it’s easy to scratch the paint with the wrench:
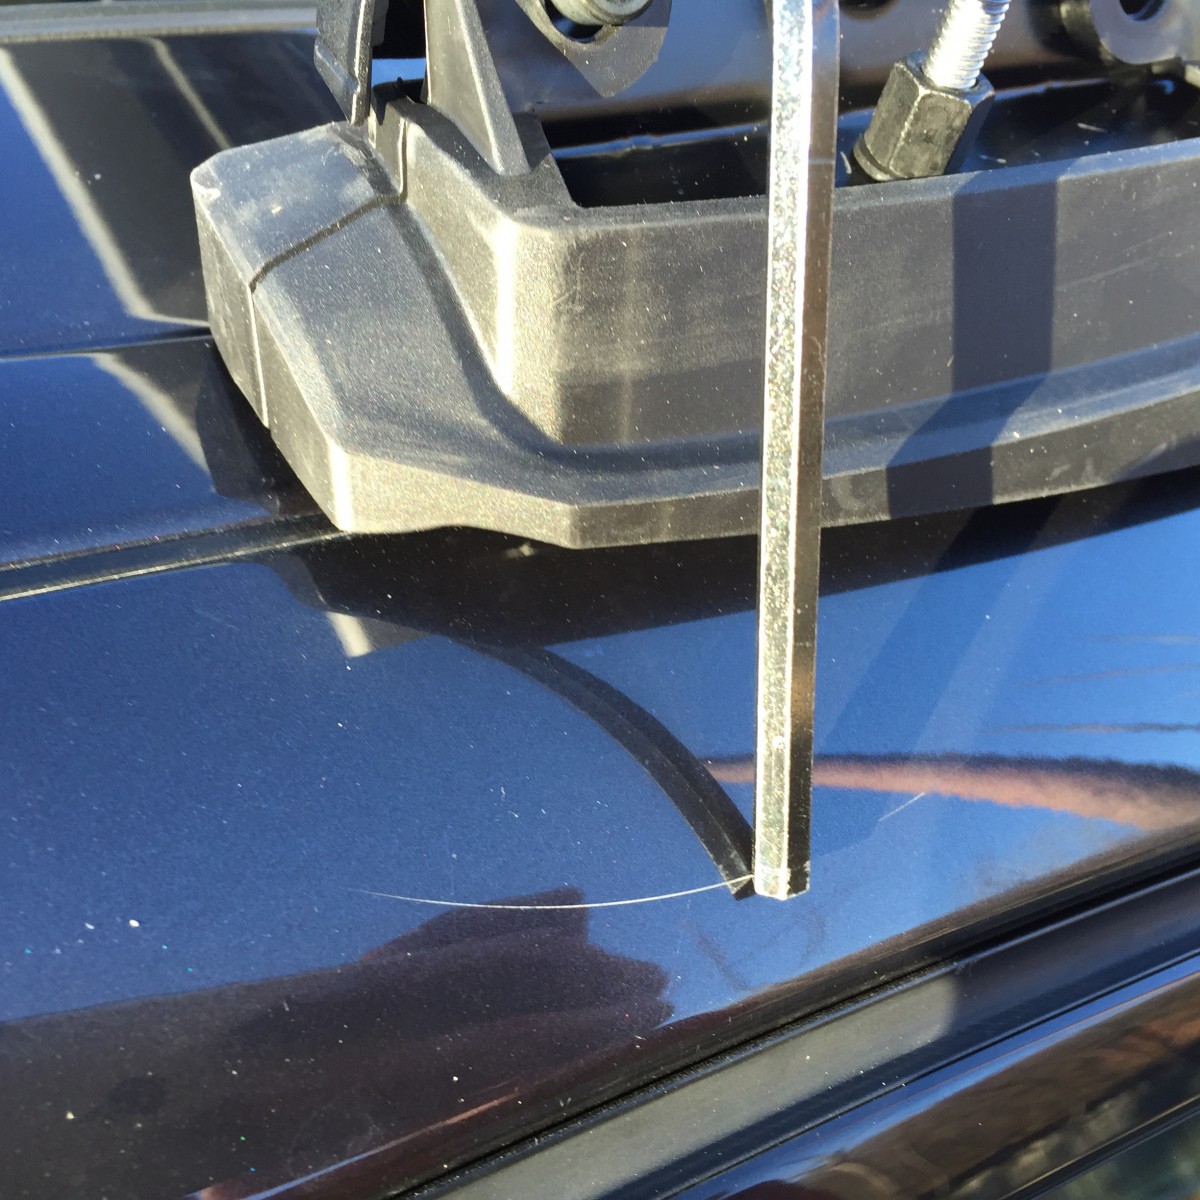
The good news is, I had just ordered a bunch of stuff for detailing and getting other scratches and swirl marks out, and I believe this will polish out pretty easily. But that’s the subject of a later blog post!
Once you get this step done, you’re 98% of the way there. The rest is a breeze!
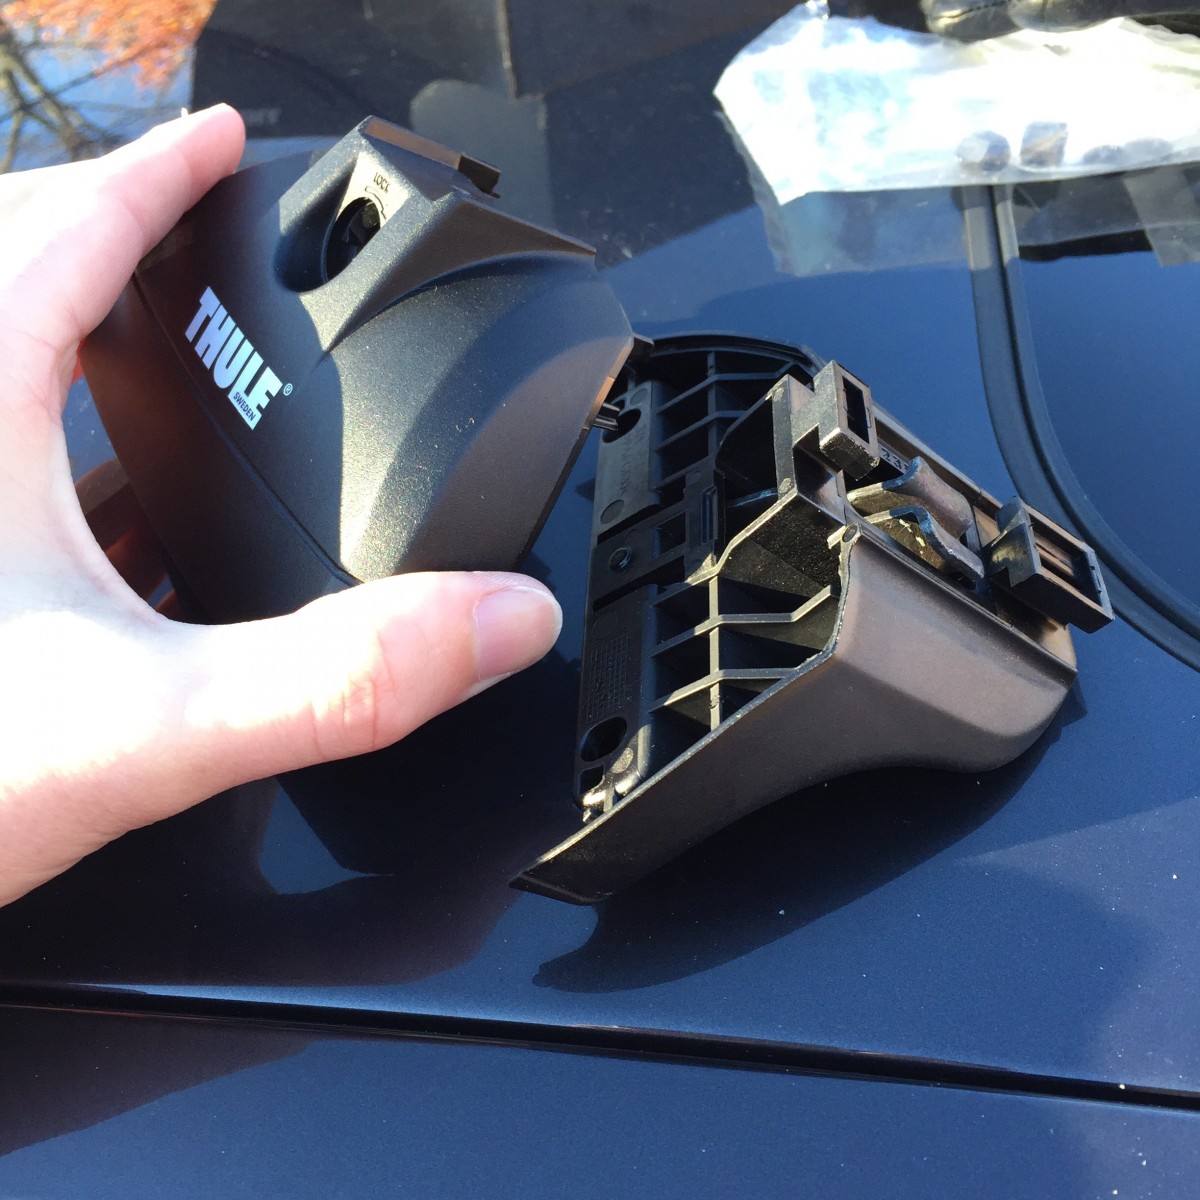
Install the caps
Remember the other half of this? The part I’m holding? Now, you just need to install that.
It just slides into place. Then you use these key-like things to lock it in:
If the slot is vertical, it’s open. Turn it clockwise to a horizontal position (I used a knife blade because that’s what I had in my tool box, but I suspect a coin would work well too) to latch it. Give it a tug to make sure it’s actually latched.
You are done. Hooray!
Perhaps the experience has left you wishing to learn a little Swedish?